Tag Archives: Tips

Resetting coordinates Revit

In years past it has been easy to reset coordinates on a Revit file, simply link in a different Revit model and acquire coordinates from that model. Yet this changed in Revit 2017 and Steve Stafford has written an excellent article on the topic where you have to select “Do not share site of selected instance”.  What happens when you have several Revit files linked to your project?  I really don’t want to change that setting on 5, 10 , 25 instances of linked models.  There is another way.  If you link in a .dwg file and acquire coordinates from it, then you can go back and acquire the newly updated coordinates of the original Revit file. 

Linked File Instance Properties for Site
Image 1

What happens when you have several Revit files linked to your project?  I really don’t want to change that setting on 5, 10 , 25 instances of linked models.  There is another way.  If you link in a .dwg file and acquire coordinates from it, then you can go back and acquire the  coordinates of the original Revit file. 

In my opinion the first thing I do is create a new “Site” or shared coordinate setting.  This way  I can go back to the original setting if something goes wrong.  To accomplish this go to the Manage tab>>Project Location panel>>Location command.  In the Location Weather and Site dialog switch to the Site panel.

Image 2

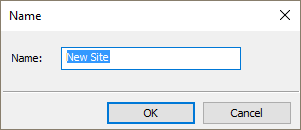
In the Name Dialog type in a new Site Name.  Once a new name is created, select it and choose “Make Current” as seen in Image 2.

Image 3

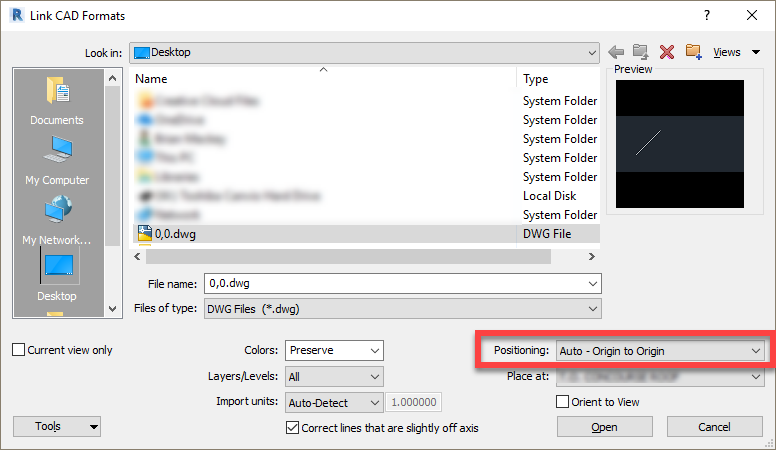
Once this is done then link in a .dwg file.  For me this file has one single line drawn from 0,0,0 at an angle and is extremely long, such that it will reach past the extents of the modeled building.  When linking this file I always select Origin to Origin as my placement setting.

Image 4

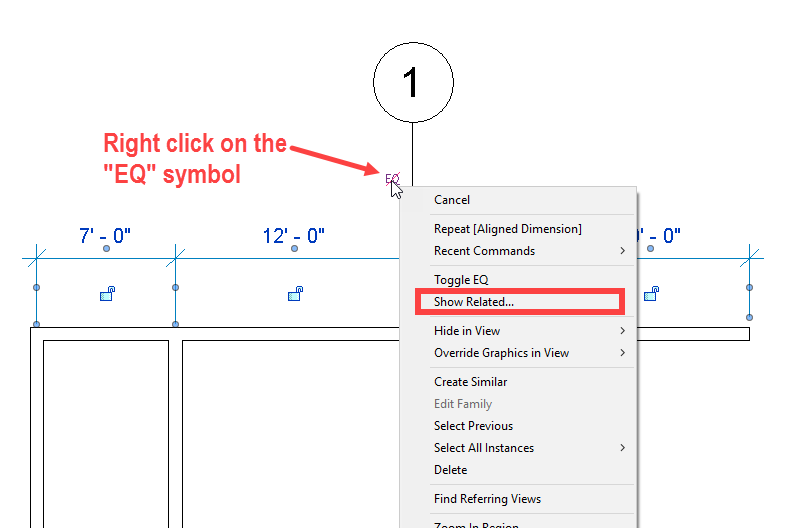
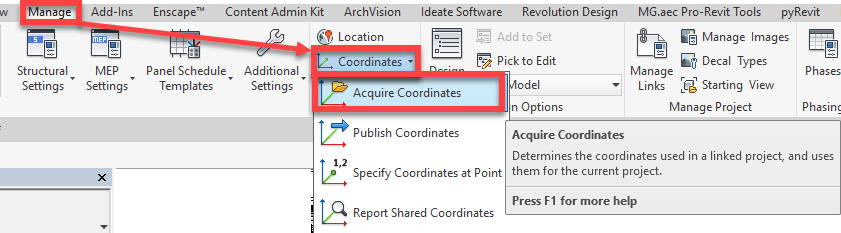
Once the .dwg file has been successfully loaded, coordinates may be acquired from this file to “Reset” the internal coordinates.  To accomplish this go to the Manage tab>>Project Location panel>>Coordinates drop Down Acquire Coordinates.  Once this command has been selected you must select the .dwg file in the view.

Image 5

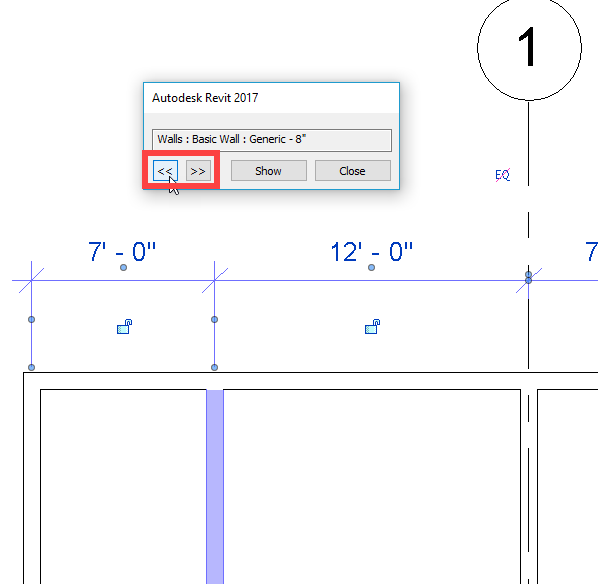
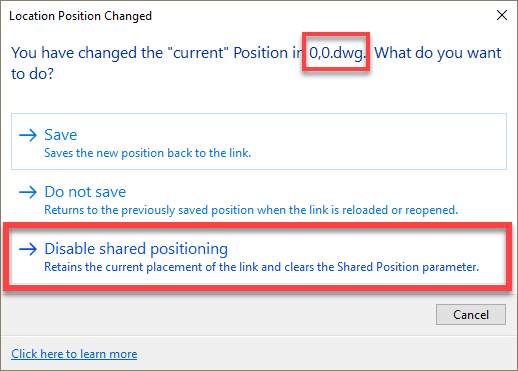
Once the coordinates have been acquired from the .dwg you may now acquire coordinates from the linked Revit file.  If your Revit file is a cloud version (BIM360 Team or Docs) then you will have to do one of the following: either remove the linked .dwg file under manage links, or save the project (not synchronize) and when the Location Position Changed dialog box appears be sure to select Disable shared position

Image 6

If everything seems to be successful I would suggest going back and removing the old Site as seen in Image 2 above.

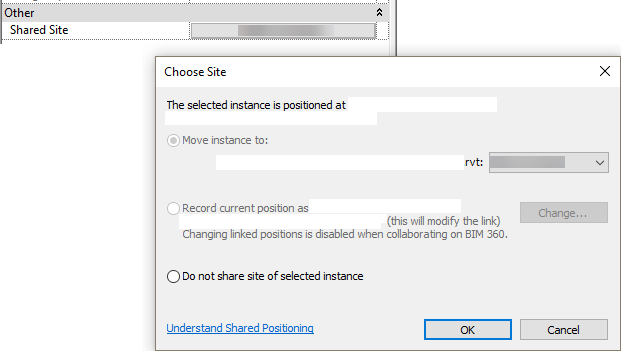
If you are on a project that has several Revit files linked into it, and all of those files have updated the coordinates to match then each file will have to be selected and in the Choose Site dialog (see Image 1), the “Move instance to:” value should be changed to match the newly named site.  If everything has been done correctly then all of the models should adjust accordingly.

Revit 2018 eTransmit to upgrade project files

I have written briefly about advantages to the Autodesk eTransmit for Revit, the 2018 version made a small but significant improvement.  While talking to the Revit Colaboration Team and upgrading a project Kyle had pointed me to this post about upgrading a Project Hub.  The document had a hidden gem in it about the eTransmit tool.  In the 2018 version they added the button “Browse folders …”, previously we could only browse for a single .rvt file.  This button allows a user to upgrade an entire folder.  The files will still have to be opened after the etransmit, such that they can become central models once again.  But the time saved not having to wait for each file to finish only to open another is eliminated.

Revit 2018 Reference Planes

It has been a while since I blogged, yes I have gotten grief about it at the past few conferences I have attended.   I have a list and I am going to try to tackle that list in the next few months.

I recently found a new feature of Revit 2018 (currently using 2018.2 so not sure which point release included this feature) that I didn’t find any documentation on and it has to deal with Reference planes from families.  For those who have heard me speak or have seen any of my content my type “A” personality definitely comes through.  What I mean is I create reference planes for any edge or line and constrain to those lines,  I also go the extra step to give each plane a Name as well as verifying the “Is Reference” value.  The name is mostly something I have done so I, as well as others, can understand the thought process behind the family.  Revit 2018 has made all this effort worth while (at least I have a justification for my type “A”ness now).  Now the project environment will display the “Is Reference” value as well as the names of the reference planes (assuming they are not defined as “Not a Reference”) when the dimension, align, etc commands are hovering over the reference plane.

The other nice part if it is a shared nested family then the tabbing to get to the planes in the nested family will also display the values

What Did I Dimension Part 2

Back in 2013 I did a post about understanding what a dimension was tied to, shortly after I learned another way to accomplish this task for an entire string not just a single segment.  I was going to follow up whit another post and got busy or spaced it out, last week I used this tip in a training session and the long time Revit users were all astonished this was possible.  This is when I realized I never did the follow up post, sorry for the 4 year delay but here is another way to accomplish this task.

Similar to the previous post after a dimension string is placed, select the string, Right Click on the “EQ” grip of the string.  This will bring up the Contextual dialog, there select “Show Related”

Once the Show related dialog box opens up it will allow the user to cycle through (using the << or >> icons) the different elements that pertain to that dimension string.


What did I dimension

Revit 2017.1 Perspective View

One of the new features of 2017.1 is the added capability to work in perspective views.  This has been a nice feature as it allows for most tools to be used as well as temporary dimensions are displayed when things are selected.

A nice added bonus that I just noticed is the fact that add in utilities can now be accessed when in a camera view.  I have been frustrated not being able to access Enscape while in the view I want to be using.