Years ago I pondered how do Revit organize the Property sets once a family is loaded into a project. It has been several years and Revit has introduces several new features and Object Styles so I was wondering what new property set had been introduces. Revit 2026 has 6 new sets compared to my last post: Sub-division, Electrical Analysis, Life Safety, Structural Section Dimensions, View to Sheet Position, and Visualization. They aren’t displayed alphabetically but in what seems to be a random order (as seen in the image below). I often take this into consideration when grouping parameters in my families and projects, as I want more common values in groupings towards the top. With this new information in hand I might have to move some of my Room/Area values for code into the Life Safety grouping so they will be towards the bottom of the list.
In case you wanted text versions of the values here you go:
Sub-ivision
Constraints
Construction
Rebar Set
Set
Graphics
Text
Materials and Finishes
Division
Geometry
Electrical
Electrical Engineering
Electrical – Lighting
Electrical – Loads
Segments and Fittings
Plumbing
Primary End
Secondary End
Structural
Layers
Slab Shape Edit
Dimensions
Mechanical
Mechanical – Flow
Mechanical – Loads
Analytical Model
Analytical Alignment
Releases / Member Forces
Structural Analysis
Forces
Moments
Identity Data
Phasing
Energy Analysis
IFC Parameters
Fire Protection
Title Text
Green Building Properties
Photometrics
Analysis Results
Model Properties
General
Electrical – Circuiting
Data
Visibility
Overall Legend
Electrical Analysis
Life Safety
Structural Section Dimensions
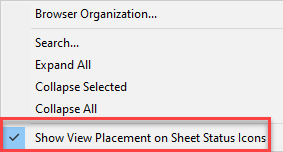
View to Sheet Positioning
Visualization
Other