Tag Archives: Tips

Revit 2017 Text Editor vs Tag

I recently posted about the issues that will arise when upgrading a project from Revit 2016 to Revit 2017.  Upon further investigating there is a significant quirk when comparing text to tags.  I was updating a detail container file for one of my clients where they use mostly Keynote tags with a bit of text alongside for more clarifications.  At first glance it may not be noticeable, however if you zoom out you can see a difference and if you make the a text value match the tag value it is easily seen on screen.
2017 Text Quirk 1

If you look closely at the screen capture above you may notice that the top line of text looks a bit more pixelated (ironically it was more noticeable in a screen capture then on the Revit screen).  As seen in the capture below it becomes more noticeable the further you zoom out in Revit, it almost looks as though the text is bold and the tag is not.
2017 Text Quirk 2

To really make a comparison I typed a piece of text (shown in blue below) directly over the tag (shown in black) and as you can see the text is spacing, or kerning, is larger in text than tags as well as the height being slightly taller.

2017 Text Quirk 3

I had thought that maybe this was an issue with updating the project and the tag as well.  I created a new tag from the 2017 template and the same thing occurred.  I don’t envision this causing many issues with upgraded projects but something I think should be addressed by the Factory if future releases.


Room Awareness

Paul Aubin and I were having a discussion the other night about signage.  It made me think of an age old process (age old for me at least) that I have been using since the early days of Revit and I thought I should share it.  When placing signage on a corridor wall it would be nice to have the sign be able to pick up a room id from a given distance on the other side of the wall.  As you may know that when scheduling an object it does know what space or room it is located in.  In this example the sign would know it was in the corridor and not represent the room or space it is intended for.  Families know their location in Revit by their insertion point, with hosted families the insertion point doesn’t have to be the face of the host.  I know this sounds odd but the family will host to the face, but the reference plane that defines it’s insertion may be in front of or behind the host and that is the value Revit will see to report the Room it is located in.  Yes Revit did introduce the “Room Calculation Point” tool in the family editor, but since it only goes a single direction and the distances aren’t adjustable it, in my opinion, is completely useless to me.

My solution was to add a reference plane behind the host surface (in this example the Host Back Face) and give that reference plane an instanced based parameter and set the “Is Reference” to weak and make sure the “Defines Origin” is selected.  This way I can now drag the reference plane such that it is inside the room that I need the sign to schedule.

Signage Insertion Point

In the project example below I have also added a side offset such that I can place the signage in the corridor and get it to read any of the room data behind the wall.

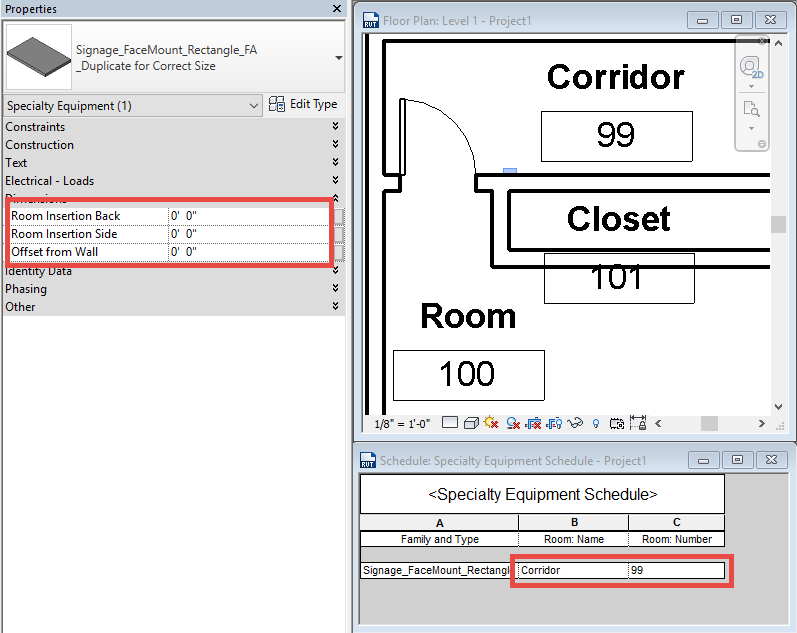
This example has all the insertion points set to 0″ and it will read the Corridor.

Signage Insertion 0


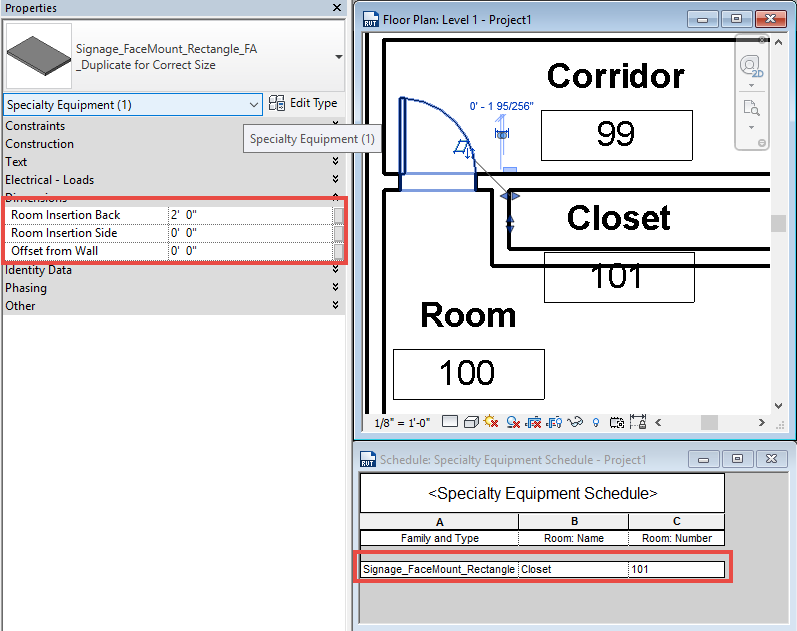
This example I was able to drag the insertion point (Room Insertion Back Value) to get it to register the Closet

Signage Insertion Back

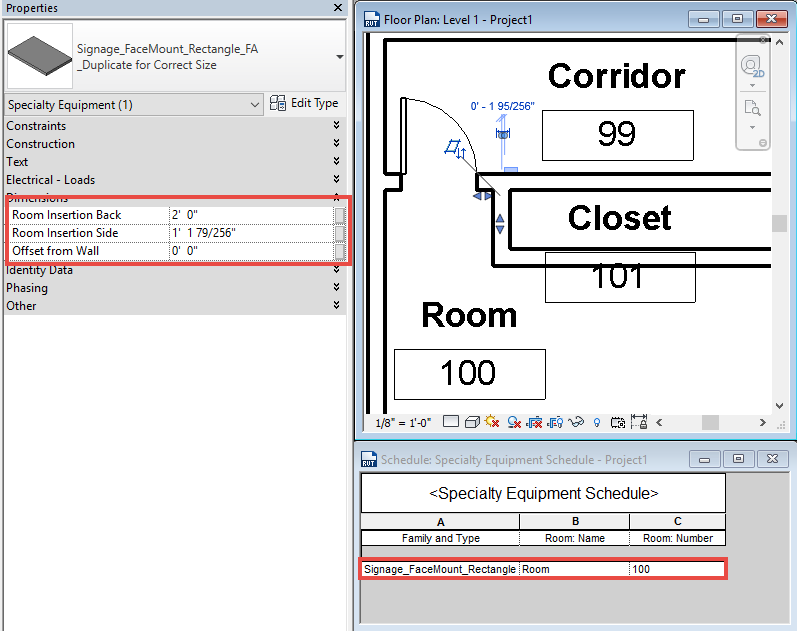
Then adjusting the Room Insertion Side value I can get it to schedule as Room 100

Signage Insertion Side

If you didn’t know about this trick hopefully it will inspire you to use it in other ways

Autodesk 360 Drive

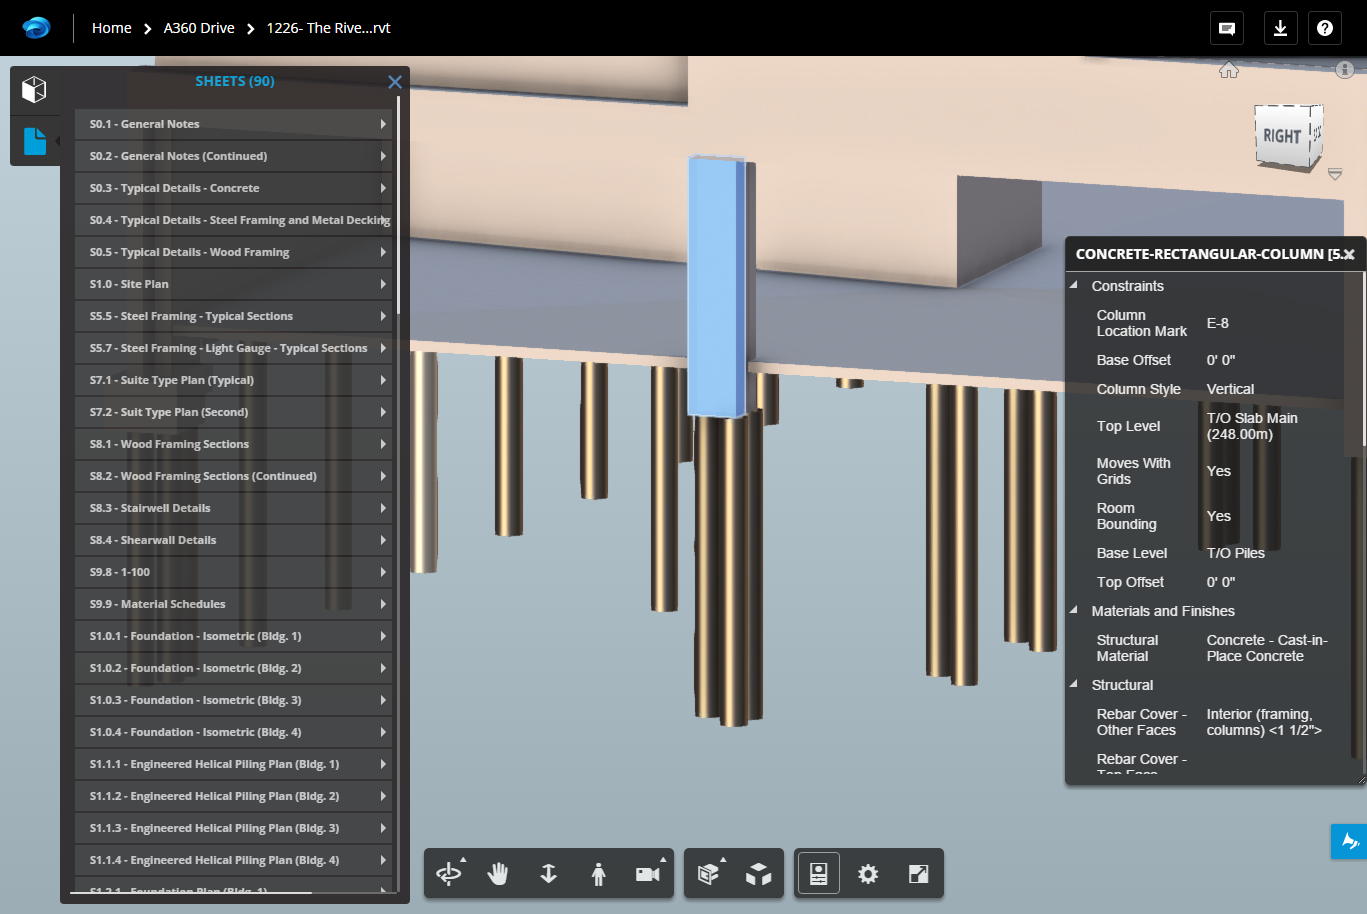
During my last Revit Radio session I found out that many users didn’t know that with every seat of software they get can set up an account using the Autodesk 360 Drive.  It is somewhat confusing since everything that Autodesk had as an online service falls under their A360 heading and for online storage there is A360 Drive, Team and Hub. All of the different versions get confusing but for this post I am going to focus on the A360 Drive accounts.  Actually there is a free version as well as a the subscription user version, the only difference that I know of is storage space, the subscription based version allows up to 25gb of storage space (I am not sure how much the free version allows).  If you are a Formit user or an Autodesk Revit Beta tester than you have already been using the A360 Drive for file storage.  Along with file storage there is also a very nice viewer that is associated with most file types.  So if you post a Revit model any user who the file has been shared with can view not only the 3D model but any sheets in that model as well.  To make this easier there is a nice panel on the left that will break the 3D model down to all the Revit categories and display all the sheets in the file as well.  Along with viewing they can also select elements and see the properties of those elements on the right side of the screen.  The navigation tools are simple and easy to use, probably because they are similar to Revit.

A360 Viewer

During Revit Radio someone had asked “Can this be used instead of Dropbox?”, my answer was absolutely yes.  Not only does it have a nice viewing feature (for most file types) it also has a larger storage capacity.

Part of the reason for this post is also to get the Revit users out there to Vote for Revit Families to get a viewing feature inside of A360.  As of now a .rfa is not a supported file type for the viewer.  Autodesk does have a website dedicated to feature requests for A360, there is a specific post specifically for Revit Families.  If you do browse the website and find any posts that you think should be part of A360 make sure to hit the Thumbs Up icon in the upper left corner to Vote this as a feature that need working on.  The more votes the higher it moves up the development list.


Revit Family Tip

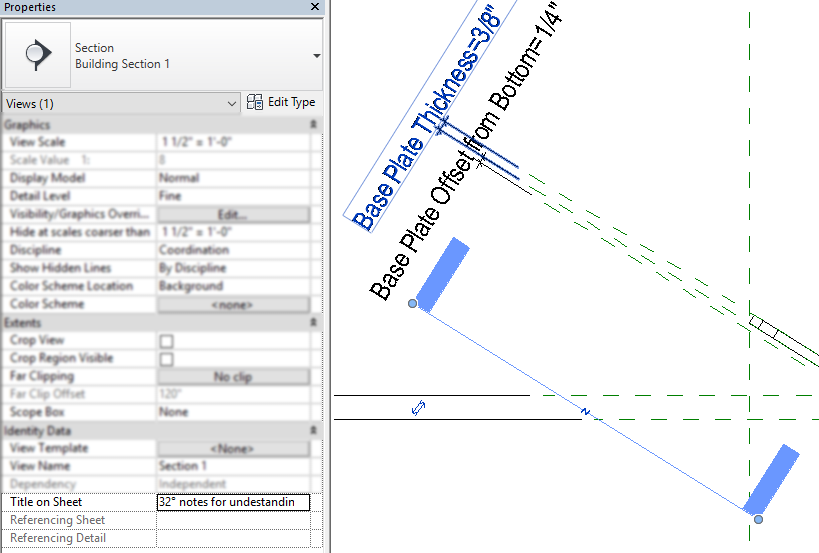
For those of you who have been following my blog you know that I can get pretty particular when creating families.  I always name my reference planes and define the “Is Reference” for example.  Occasionally I have the need to create a section in the family and sometimes I want to have notes associated to the section such that I can reference why I created it.  Yes we can change the name to give a description but what if the name becomes long or we need additional information.  One tip I have is to use the “Title on Sheet” value to help in this situation.Family Section Label

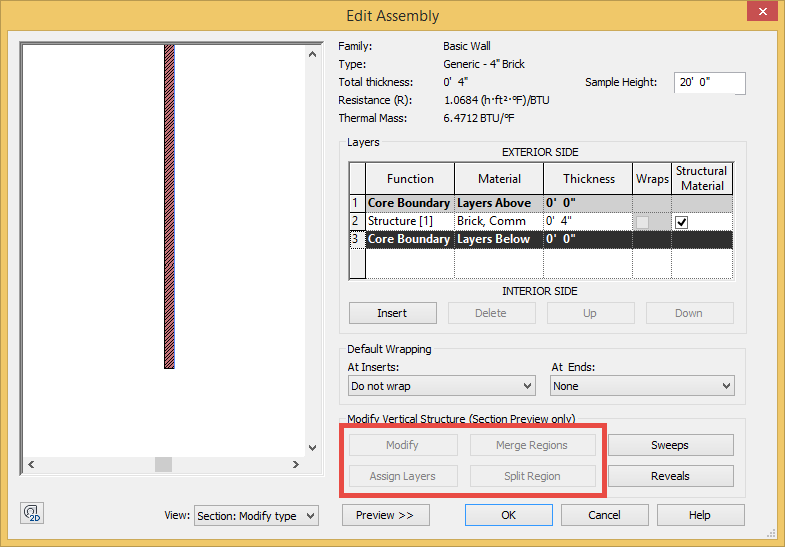
Wall Vertical Structure Grayed Out

While assisting a client I was showing them how to create a vertically compound wall the only tools available to me where Sweeps and Reveals.  Modify, Merge Regions, Assign Layers and Split Region were grayed out.  I had the section preview active in the dialog so this wasn’t the issue.

Camera View Limitation 1

I usually modify families by selecting them in the Project Browser and not selecting them on the screen.  In this case this was my downfall, I hadn’t noticed that amongst all the tiled views on the screen the active one was a camera (perspective) view.  A well known fact is that there are many limitations while having a camera view active.  For instance having a camera view active will limit the capability to activate a Revit Addin or Extension.  Having access to only a couple of the vertical structure modification tools was a new one to me.