Category Archives: Platform

Revit Basics – Group Origin Points

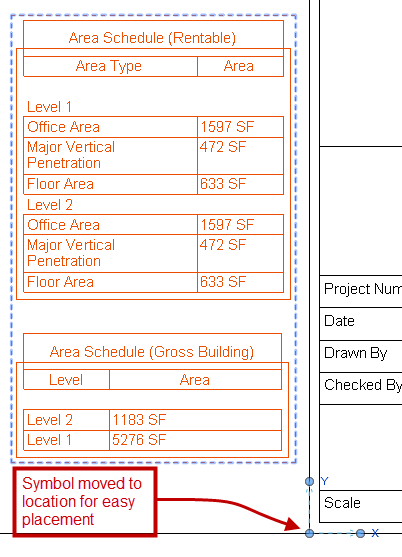
I am not a big fan of groups I tend to think they get over used in lieu of families, but this post isn’t going to get into that.  With that said there is a time and place for their use and when they are being used I think there are a couple of tips that I see commonly overlooked.  The simplest tip to discuss is the groups origin point.  When a group is created it will place a symbol in the center of the objects being grouped, this symbol is the origin point.  This symbol is used not only for the origin point when placing the group but also as the origin when the group is being changed from one type to another.  To adjust where this is located simply select the group and drag the symbol to a location that is better than the random center(ish) area of the group.  This way placement of the group is easier as well maintaining it’s placement when the group type is changed.

Group_InsertionPoint

In the image above a group was created for alignment of several schedules onto sheets, the “Group Origin” was moves such that is could easily be snapped to the title block.

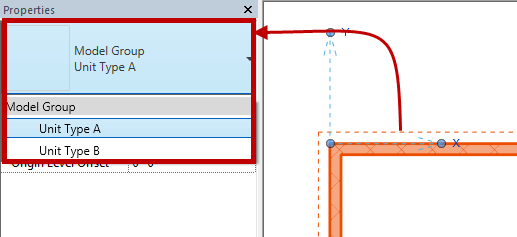
Another tip is the fact that groups can be changed just liked any family.  If a group is selected it can the be changed via the “Type Selector” just like any family.  This is why it is important to pay attention to the “Group Origin” as stated above.

Group_TypeSelector

Last tip for the day is if you are only using a group one time consider ungrouping it and purging the group out of the model.  It is a known fact that groups will slow Revit down especially when they are over used.

Revit Basics – View Range

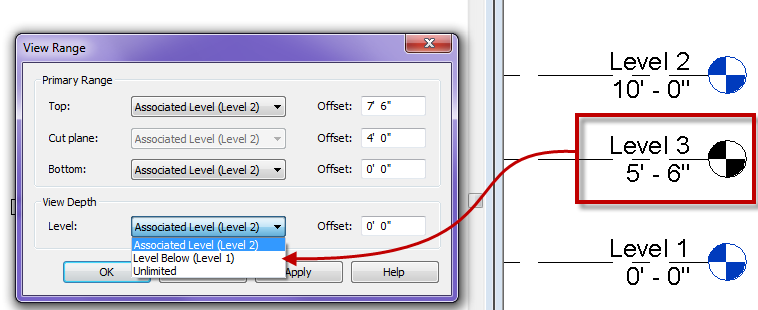
Over the years I have had the question come up on why a level can’t be used as an underlay or be selected for view depth or bottom while in the View Range command.  ONLY levels with a view associated to them can be used in these situations.  If a level needs be generated and used for one of these options just add a plan view, so it can be used.

Level_NoView

Generic Annotation Bug

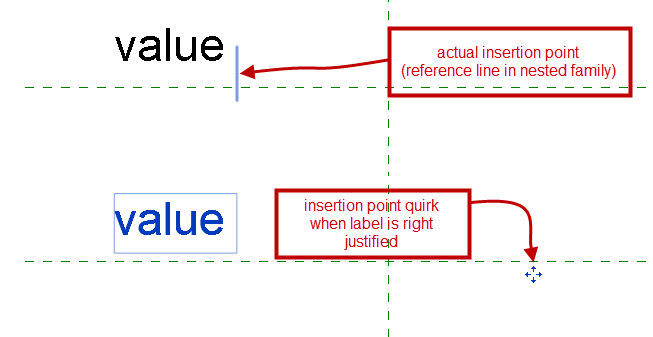
While working with a family to resemble a Level head for detailing I noticed a quirk when dealing with Generic Annotations and justified text.  I had nested in a Generic Annotation family that only had a right justified label, this was nested into another generic annotation family.  What I discovered is right justified labels in a generic annotation family will end up moving the control point if there isn’t a line in the family.  This is odd because when the label is center or left justified the insertion point remains constant.  I traced this issue back to Revit 2012, can’t believe I hadn’t discovered this issue previously.

Generic_Annotaion_Quirk

To resolve this situation a line needs to be added to the family, I personally just added an invisible line on the vertical reference plane, such that it was easier to find if the label was blank.


Scope Box Quirk

When placing scope boxes they will come up with a default name Scope Box ??, where the question marks are a number.  If you rename a scope box to say Area 01 then use the scope box command to place a new one, it will come up with the name Scope Box ??.  However if you copy a scope box it will have a value one higher than the previous, so a copy of Area 1 will be Area 2, the same is true if the name was Area A it will be Area B.  So if there are going to be a multitude of scope boxes on the project think about renaming the first one and copying it around, easier to adjust shape than rename, or at least that is how I do it.

Analytical Model

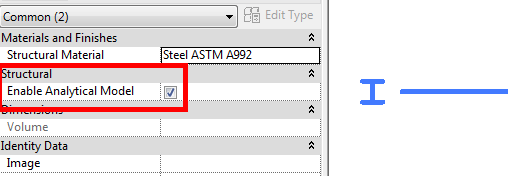
In preparation for my session on Structural Tools for Architects at BIM Workshops in Anaheim I thought of a nice tip that would be a good blog post.  When discussing structural tools inside of Revit I have heard the comment a few times that the model slows down once structural members are added.  If the members being added are K series joists or something similar then it could be due to heavy families.  Never the less what is also adding to the speed issue is the fact that all structural member, by default, have analytical properties attached to them.  Unless your firm exports out the structural members to an analytical program this feature isn’t needed.  To resolve this issue after the model has been created select all structural columns, beams, foundations etc and uncheck “Enable Analytical Model”.  If this is unchecked before placing an element that setting will be remembered and any element placed after, thus eliminating the need to keep unchecking as the model develops.

Enable_Analytical

The real tip here is to open your company template place a structural column, beam, brace, floor, wall and all three foundation types, before placing each type uncheck the “Enable Analytical Model” then delete the elements.  Your template has now been set to not have analytical model enabled thus possibly speeding up future models.  The only nuance is any member as part of a beam system or truss will still have the analytical model associated to it.