Converting .exe for Autodesk deployment

When Autodesk releases a new service pack it is usually only available, at least with out massive searching, as a .exe file. The downside to this is the fact that if this wants to be added to a deployment they will only allow .msp files to be used.  On the bright side there is a simple way to convert them, however they must not be a self extracting zip file that has the .exe extension.

1. Start the Windows Command Prompt (DOS Window) by starting CMD in the start bar
2. Navigate to the directory where the patch resides. (I’ll use C:\Temp for this example) by typing CD\temp
3. Enter the file name followed by /e and then an output path along with file name for the MSP file (I usually keep the same name and folder location)

Example: (patch name is Autodesk_Revit_2015-x64_Update3.exe) Type in what is between the ” ” and spaces before and after the /e switch

C:\temp>”\Autodesk_Revit_2015-x64_Update3.exe /e c:\temp\Autodesk_Revit_2015-x64_Update3.msp”

RTC 2014

My blog has gone dark for a while in case you didn’t know my family was blessed with a beautiful baby girl, aka #BIMbino. I was planning on taking a break for a while and then start blogging again once she started sleeping through the night.  Since this hasn’t happened yet and I don’t envision this happening anytime soon I decided it was time to start up again, however I doubt I will be blogging as often as before the BIMbino.  What better of an excuse to get me started than Revit Technology Conference.

This year at RTC I was privileged to speak in three sessions.  This isn’t the reason I am blogging I also attended some great sessions taught by excellent well known speakers.

One of the sessions I enjoyed was based on Navisworks and quatification taught by Jason Dodds.  This session covered the takeoff tools, creating and importing catalogs.  Jason also did a great job explaining the difference from when these tools were in Autodesk QTO.

Another session was taught by Andy Milburn where he covered mass families where he has developed a few different ways of making rigs to create content.  I personally like his box theory and using an invisible box as a rig platform.

Havard Vasshaug taught a two part lab on computational logic in structure.  Unfortunately I was only able to attend half of this session but what I saw was great.

I got to finish up the conference on the main stage for the redesigned Tips & Trick led by Desiree Mackey.  In the past a they have presented slides based on tips from different sessions taught, this year they decided to a battle of the tips, complete with a gong.  There were two teams myself, Amy Manning and Matt Nelson vs Zack Kron, Scot Brown and Nick Hugley and we had to present some tips from the sessions while being able to add in some of our own.  If the panel, Jim Balding or Wesley Benn decided you were stumbling, didn’t like the tip or just wanted to hear a loud noise they would with the 3 foot (91cm) GONG and you had to move on.  I thought it was a new fun way to present the tips and it did get the audience involved which for me was very fun.  Although we did win some considered bringing two babies on stage was a bit of cheat.

With that said the North American conference was well worth the time and the information one can get from it makes it a must attend event.  I am looking forward to speaking and attending RTC Europe in Dublin over Halloween.


Dimensioning – Tips

One quick dimension tipis a simple way to dimension all grid lines along an axis.  Draw a wall outside of the building, making sure it crosses over all of the grid lines that need to be dimensioned.  Now use an aligned dimension, and in the options bar change the Pick: value from Individual References to Entire Wall.  Click the options button and check Intersecting Walls.  Then select the wall and place the dimensions.  Now delete the wall and the dimension will remain.

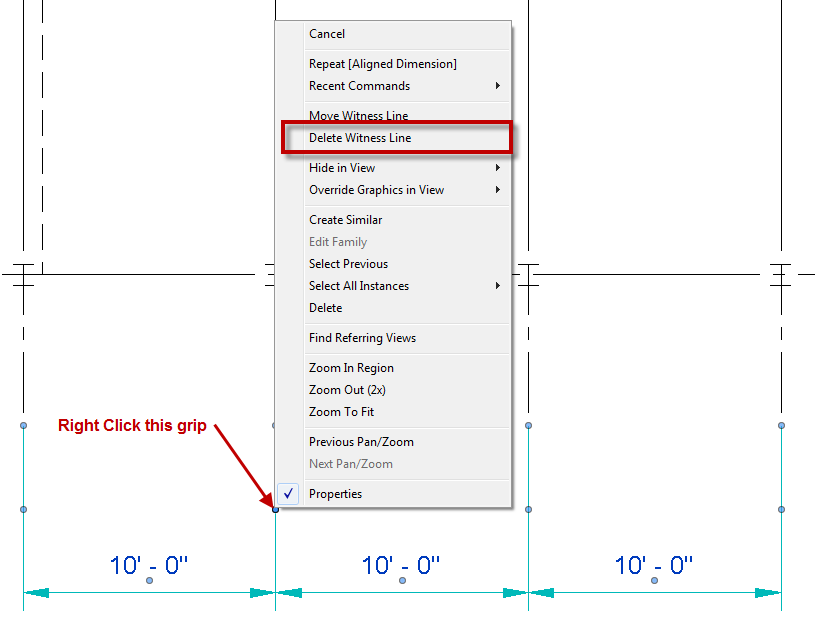
If there is a need to remove only a portion of a dimension string while keeping the string continuous, then right click on a the middle grip on the witness line and select Delete Witness Line.  If the need arises to break the string apart, then TAB to select the individual string shape handle and delete that portion of the string as normal.

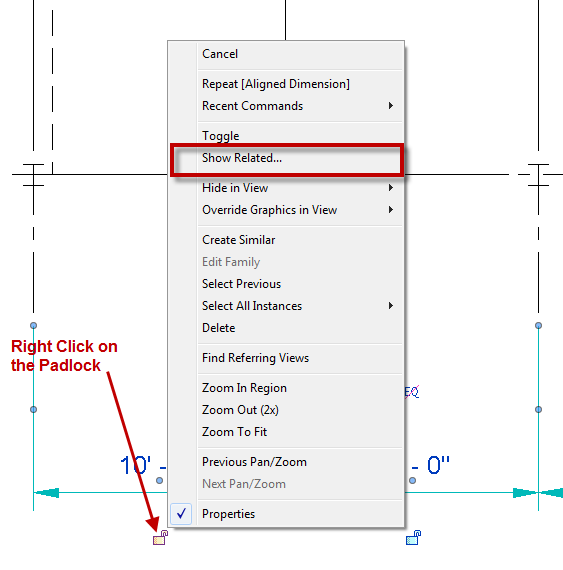
Ever had a dimension and been unclear as to what was actually dimensioned? If so there isn’t any need to start clicking elements on the screen to see if the dimension turns blue.  Instead right click on the padlock, regardless of if it is locked or not, and select “Show Related”.

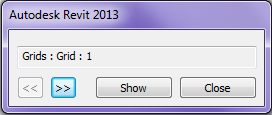
This will bring up a dialog box that will have options to cycle through the two objects that are being dimensioned by that dimension segment.

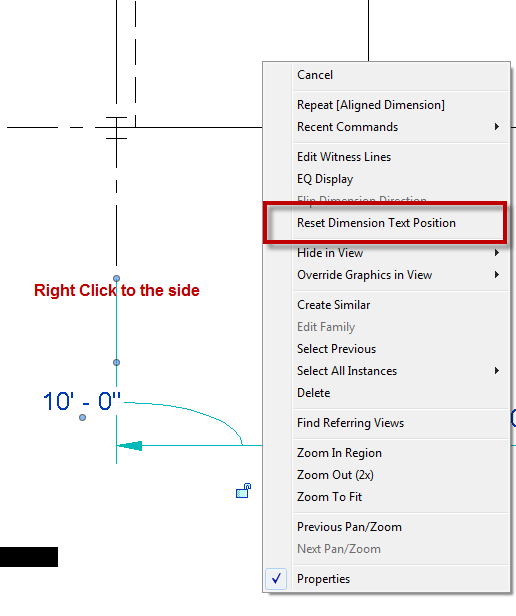
When a dimension text value is moved from its’ origin, there is a tool to move it back to the original position.  Select the dimension string, right click and select Reset Dimension Text Position.

A classic dimension tip is how to use dimensions to move/alter the element it is dimensioning.  If a dimension is applied to an element then selecting the element will activate the dimension and it the dimension value can be changed.  Furthermore if the dimension type is set to fractional inches, or millimeters then those values can be used for input, instead of having to input feet or meters (ie type “6” instead of ”0’ – 6”, “0.5” or “100” instead of 100mm, “0.1”).

Autodesk 2014 Download

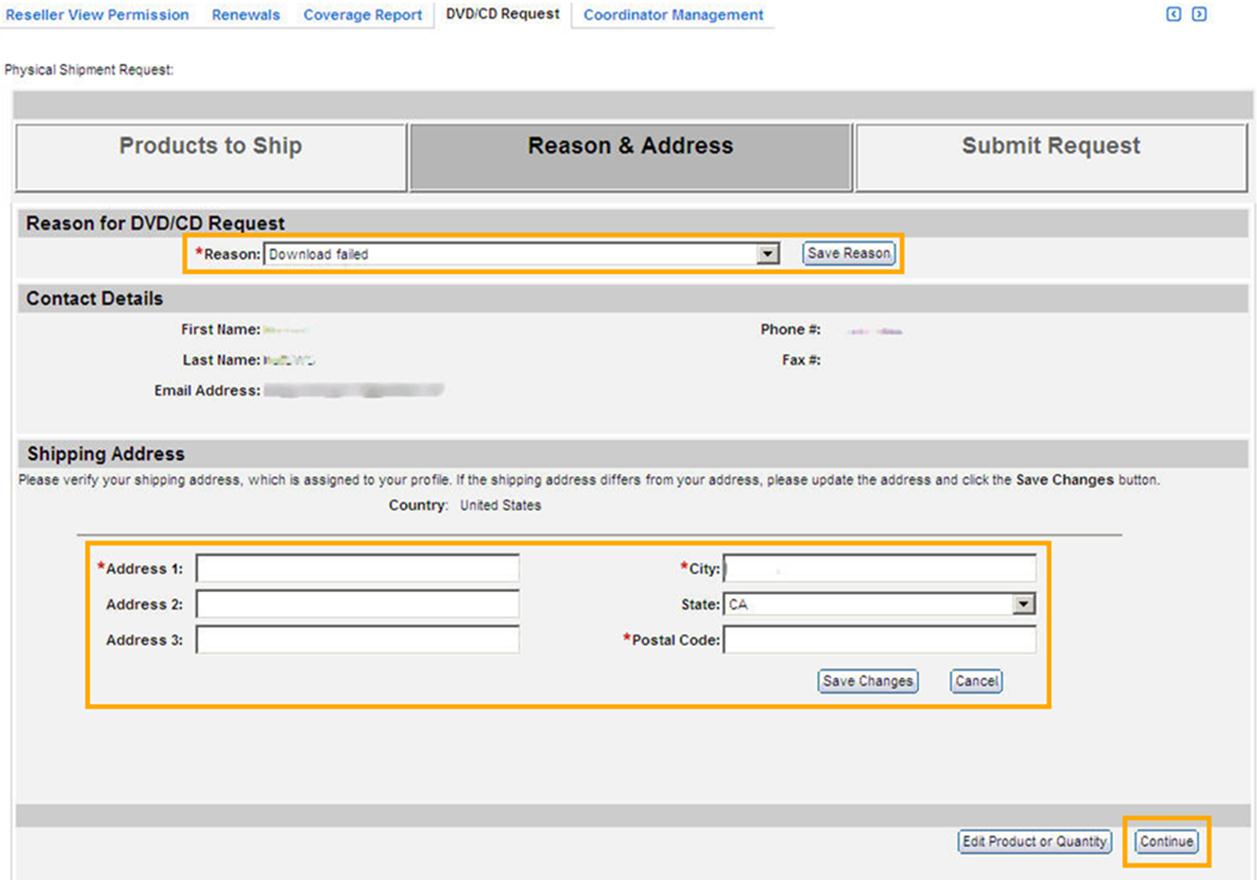
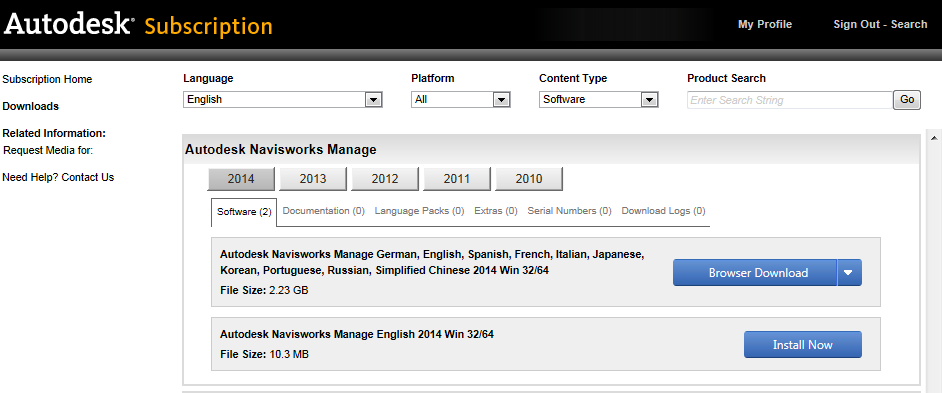
This year Autodesk has stated that the software will be available for DOWNLOAD ONLY.  However if you run into issues during the download you can request media be shipped.  If you have a slow Internet connection or simply like the box on the shelf the check out the knowledge base on how to request the media.  Once the software is available for download, April 1st, you should be able to request media.