Monthly Archives: January 2012

Roof Overhang Values

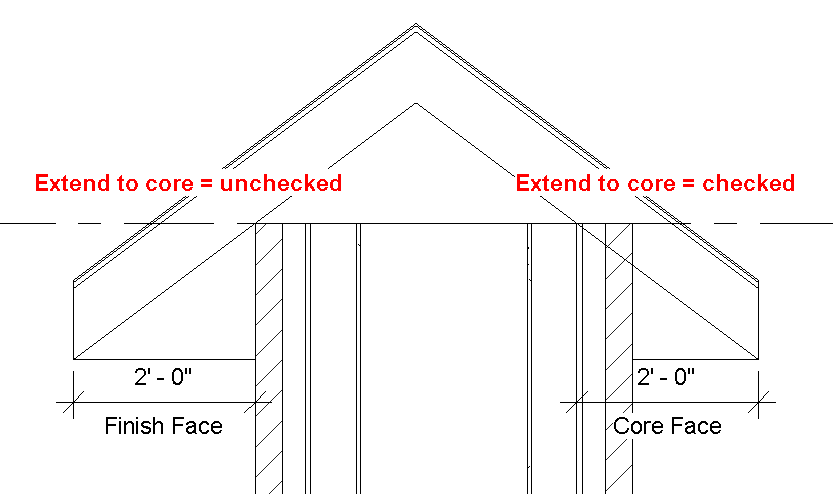
A question came up on Revit Radio yesterday that I thought would make a good post.  The question was about roof overhangs and how to control if the distance is measured from the face of the wall or the wall studs (wall core in the Revit world).  The first thing to clarify is that everything I am showing is ONLY true if you use the Pick Wall button instead of just drawing lines while inside of sketch mode.  I use pick walls because if the wall moves then the edge of the roof will move with it and maintain the overhang value.

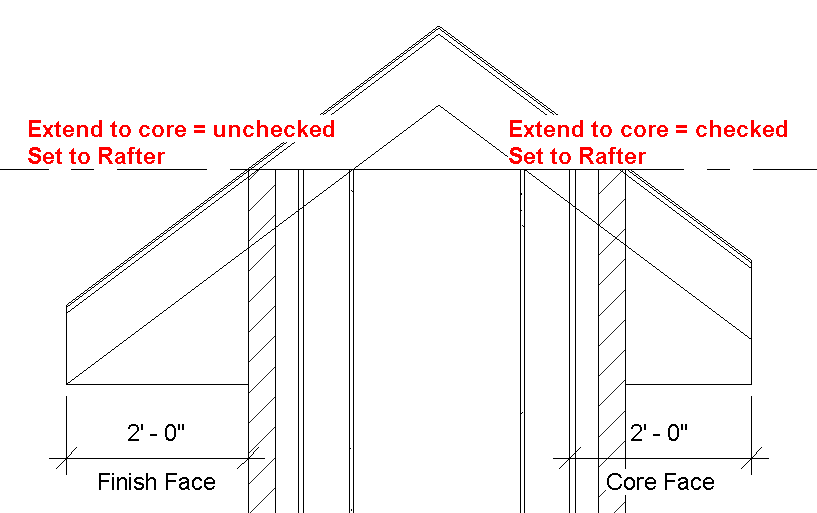
So how does Revit determine where to set the overhang value if you use Pick Walls?  In the Options bar next to the overhang value there is a check box for “Extend to wall core”, when this is selected the overhange value is taken from the face of the core, if this remains unchecked then the overhang is determined from the finish face of the wall.Then the question came up what if I want it to have a birds mouth notch?  There is a setting for this too.  In the properties of the roof there is an option for Rafter or Truss, if the value is Truss (default option and shown above) then the roof starts on the exterior face, if the option is Rafter the roof is set to the inside face.
These explanations seemed to answer the question, let me know if it didn’t clarify things for you.

Wall location lines

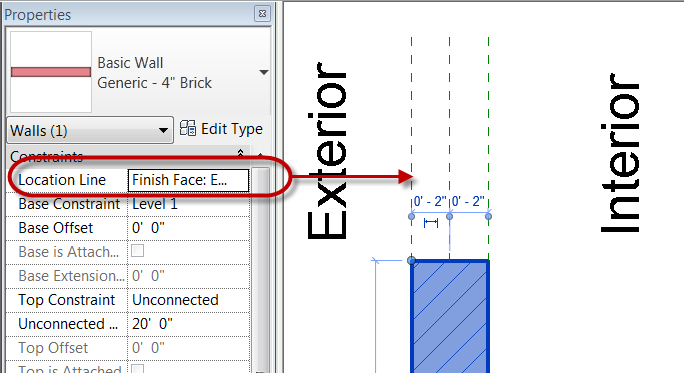
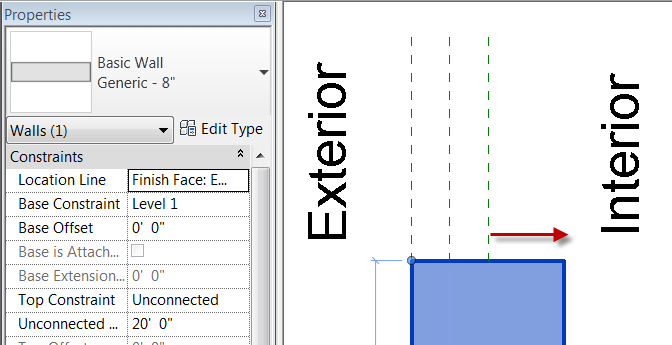
So a post over at Linked In today got me thinking about walls.  When I have clients start off a project they usually start with some sort of generic wall type, then as the project develops the walls get changed out to be something a bit more specific.  Not everyone knows that when a wall type is changed it looks to the location line to know where to adjust from.  So if you change a wall and its’ location line is Wall Centerline then it will grow or shrink equally on each side, if the location line is Finish Face Exterior then it will grow completely to the inside.

When changing the exterior walls that need to grow to the inside. Select all the walls that need changing and change the location line appropriately.  This way it isn’t a crap shoot to find out if they moved in, out or equally.  When changing  all of one wall type, use the “Select All Instances >> In Entire Project” tool to speed up the process.

Revit Floors Room Bounding

On Monday Steve Stafford posetd about how finish floors can do bad things when passing a model off to the MEP consultants.   I have also seen this cause issues when the architects go to tag their rooms and and the tag won’t display the room information.  The same situation is true as Steve had posted, all finish floors should be non “Room Bouding” in the Revit model.

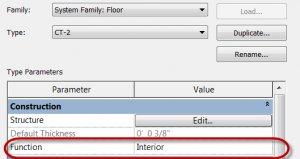
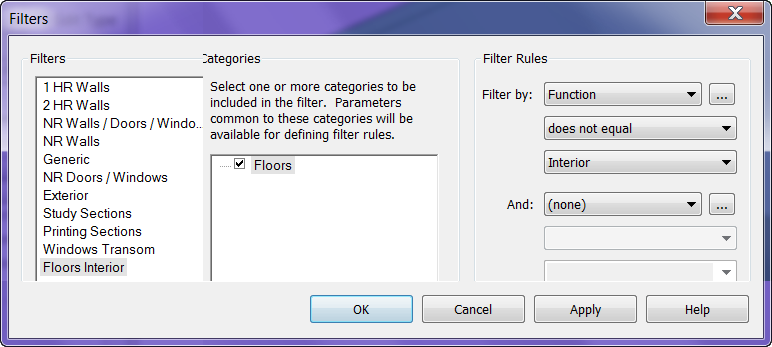
As a good practice I will have architects set the “Function” to all finish floors to be Interior.

Now that this is set I will create a “Filter” so that it’s “Funtion – does not equal – Interior”.  Then I apply this filter to a 3D view where I turn off the visibility of the filter and only have floors displayed.  Now I can just select all the floors in the view and turn off  the Room Bounding check mark.


Autodesk Project Browser Research / Collapse Project Browser Tip

The folks over at The Factory are wanting input from all of their Revit users.  They are wanting to see a screen capture of your project browser and the properties of it.  I would suggest collapsing the tree to just the structure and not the individual views (see tip below on how to do this easily).  Go to this post to help them out and possibly make future versions of Revit more to your liking.

Browser Tip:

If you need to quickly collapse the Revit Project Browser then simply change the Browser oganization in the Type Selector to a different one then change it back this will collapse all.  If you want to expand the entire Project Browser then hit the * key when on the Views or Sheets.


Vasari Sliders

For those of you out there using Vasari found out that it went down at the end of last year and it is up again.  Well they also lost a few other parts of the site.  If you were wanting to play with the sliders (see the featured add ins at the bottom) that site was down until last Friday as well.  But thanks to all of the dedicated people over there this part is up and running.