Monthly Archives: February 2012

Revit Database Link

For those of you out there who have been using the Revit Data Base Link from the subscription site will be happy to know they have posted a new version for Revit 2012. Please log on to YOUR subscription site and download the new version.

The new release is intended to address the following issues:
  1. The following error when attempting to export:    Error: Attempted to read or write protected memory. This is often an indication that other memory is corrupt. 
  2. A blank RoomFromToAssociations table caused by project phasing.


Revit Basics – Pick Lines

This is an excerpt from an article that I wrote for AUGIWorld.

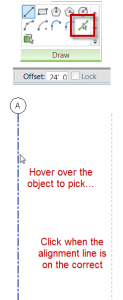
Instead of drawing a line, wall, grid line, etc, between two points, select the Pick Line and then select another line, grid, element, etc to create the desired element.  Add an offset to the pick lines (on the options bar), and very quickly create elements, such as grid lines, with accurate spacing.

Autodesk Design Review Mobile for Android

Autodesk had released Design Review Mobile app for the android market.  Read more on the blog Between the Lines with Shawn Hurley.  Similar to the app for the iPad it can only use files stored on your Autodesk Cloud account making it really only work if you are on subscription.  So if you want to be able to use your own documents then you will have to get your cloud account up and running first.  I have to say I have found the iPad version really nice to use out in the field to view all sheets and even the 3D model while on site, even with the size limitation because of the iPad.  I will look forward to testing this out on an Android device to see how the size limitation is going to be affected.

Revit Basics – The Filter Button

This is an excerpt from an article that I wrote for AUGIWorld.

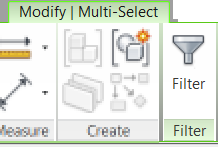
When multiple items are selected, it is a common practice to use the Filter option that appears on the Ribbon’s Modify/Multi-Select Contextual Tab only when multiple items are selected.

Alternately, one might use a keyboard shortcut such as “FF” to activate the filter.  One may have even noticed that there is a tiny filter symbol at the bottom right of the screen, on the Status Bar.  What is lesser known is that clicking on this symbol will activate the filter command.

Linework Tool and Underlay

This is a tip that I have been showing for years and I was reminded of it today while training a student.  The tip involves the use of the Linework tool along with underlay while in plan views.  This student was asking how to display the roof overhang in plan and wondered if it could be displayed as hidden lines.  The first, most CAD-like, response was to simply draw hidden lines where these elements were.   I explained how that is an option, but what happens when the roof changes or moves?  Now someone would have to go back and adjust the lines to match the changes.  If Revit could do that automatically, that would be a better solution.  My suggestion was to turn on the underlay so that the elements in question could be seen.

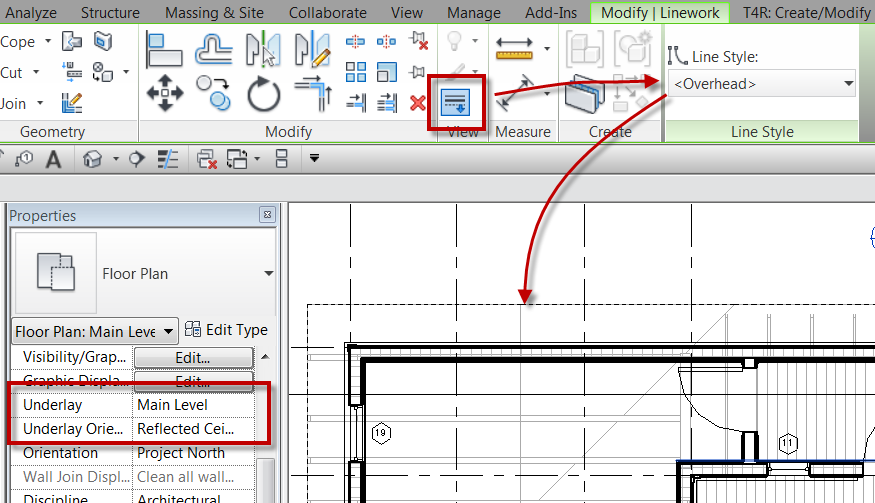
To do this, set the underlay to the current level, and the set the plan orientation to Reflected Ceiling Plan.  Then, on the Modify tab in the View panel, select the Linework command and set the line style to <Overhead>.  Now select the lines that need to be displayed in the plan.  Once that is done go back and change the Underlay to None and the lines that had been changed via the Linework tool will still be displayed.


If you decide later that the lines are no longer needed DO NOT DELETE the lines, this will delete the physical element.  Instead, again use the Linework took and with the linestyle <By Category> and select the lines.  The lines will go back to their default display, or not displayed if the were changed as an underlay.