I was asked the other day by a user, a frustrated user, how come you can’t go right into the rotate command and place the center rotation point? Well you can easily do this with a keyboard shortcut by default the keys are R3, if you want to change the default the command name in the Keyboard Shortcuts (KS) the command name is “Define a new center of rotation”.
Tag Archives: Tips
Select by ID
A few days ago, a coworker asked for a way to locate every instance of a family (in this case it was a detail component family). His goal was to delete all instances and the usual process of selecting all instances in the project and hitting delete occasionally does not in fact delete all instances so he wanted another way. He had considered scheduling the instances and then deleting, but not all elements can be scheduled. This particular issue gave me a chance to suggest one of the useful command that I believe tends to be forgotten. The following is the procedure I suggested for locating all instances of a given family, regardless of the ultimate goal (deleting, changing or simply finding them all).
Start by selecting one instance in the project or the family in the project browser, right click and select all instances. Then, in the Manage tab, select “IDs of Selection”.
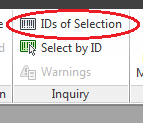 This will bring up a window showing the element IDs of all of the selected elements.
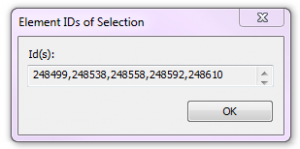 Highlight all of the IDs and copy using Ctrl + C. Then click OK and go back to the Manage tab and select “Select by ID”.
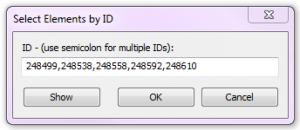
In the window that appears, paste the IDs that were copied to the clipboard using Ctrl + V.
Finally, click Show and the project will cycle through the elements, locating them and showing them.
Side note: if these items are needed for future selections, and you are working in Revit Structure, you can save the selection (also on the Manage tab), or if you are not in Revit Structure, paste the IDs into a text file for future use.
Rotating View Title
When placing a view on a sheet there is the option to rotate the view 90 degrees clockwise or counterclockwise, unfortunately this also rotates the view title. So how do you rotate the view with out rotating the title? The answer is to not rotate the view but to rotate the crop region of the view back in the original view, then when it is placed on the sheet it will work the way you were wanting.
Revit Basics – Selecting a Detail Bubble
For several reasons Revit users will often want to show only the bubble portion of a section cut or a callout. For example, they want a bubble shown thus:
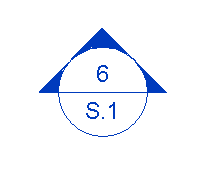 This is normally achieved via pulling the tail in very close. Unfortunately, that part of the bubble is what one would click in order to select the section cut (since clicking on the bubble itself will not work). There are a few ways to get around this, some more common than others.
First, one might draw selection/crossing window to select the bubble. This will work, but might cause other objects to also become selected.
Second, using the omnipresent tab method to tab to the bubble will work.
Finally, perhaps the least known solution, holding down the control button will allow the bubble to be selected by clicking it.
This works with all veiw types including Levels, Sections and Callouts.
Revit Basics – Create Similar
This is an excerpt from an article that I wrote for AUGIWorld.
Until Revit 2010, the only easily accessible location to activate the Create Similar command was in the right-click context menu after a single element is selected. Revit beginners probably didn’t even know the command existed. Create Similar is now available on the Modify Tab, but remains grayed out until a single element is selected. The inquisitive Revit novice may have discovered this command’s function by hovering over it and reading the tooltip, but others may not have noticed it and don’t know it exists.
The Create Similar command activates whatever command is necessary to create a new instance to match the type of an existing element. For example, selecting a wall and clicking Create Similar activates the wall command and sets the type of the wall to match the one selected;then the user maydraw another wall instance. This command is particularly useful for several reasons. It matches an element’s type without the user having to know that type, and without having to navigate through the (occasionally long) Type Selector looking for something specific. One may just copy elements to achieve a similar outcome, but then the user is left modifying, moving and altering the new instance after it is placed. Also note that copying will not only copy the desired element, but also any hosted elements, i.e, copying a wall will also copy all of the doors and windows in that wall. While extremely useful, the Create Similar command is not without its flaws. It only matches type properties, not instance properties – or at least not all instance properties – so, for example, it will create a wall of the same type, but not of the same height. Strangely, however, it will match location line settings, which is an instance property.

