Tag Archives: Tips

Cross-Section Rotation Quirk

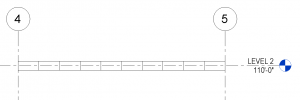
I was recently doing a quick little job for a client and in modeling the structure I needed to show a 2×4 wood framing member turned flat, so I used the OOTB 2×4 and set the Cross-Section Rotation to 90 degrees.  The following is what I got.
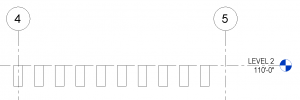
Since I wanted the top of the framing to align with the level, and the above was the result, I was reminded that the cross-section rotation’s base point is the intersection of the workplane and the Lateral Justification, so I changed the Lateral Justification to ‘Side 1’ and got my desired result.
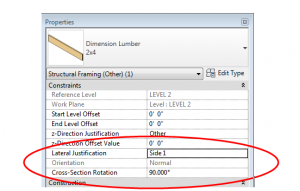
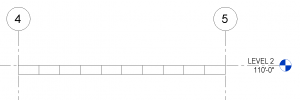
This got me thinking – what if I had wanted to move the framing more than just a little?  It is a known quirk that the z-direction offset doesn’t work quite right when the cross-section rotation is set to anything other than zero, but I haven’t seen any documentation to explain what is really going on so I thought I would figure it out.

The conclusion is this: assuming the cross-section rotation is set to a value, a, if you enter a value, z, into the z-direction offset, the member will move as follows:

Vertical movement = z*cos(a), where up is positive

Horizontal movement = z*sin(a), where left is positive

I could paste a ton of screen shots here showing a bunch of variations, but I encourage you to go play with these settings and see what happens.  Take particular note of the fact that cross-section rotation values greater than 180 degrees causes positive z-direction offsets to cause movements in the negative directions.

So what is the solution?  I would suggest using the start and end-level offsets for z-direction movement.  However, if there is a reason why that is impossible, or if you just want to test it out, the following equations will produce desired results.

For a desired vertical offset, z, a cross-section rotation, a, and assuming no horizontal movement is desired:

In z-direction offset enter: z / cos(a)

And then move the framing member to the right this amount: z*tan(a)

For a workplane that is not horizontal, the above equations work if vertical is taken to be perpendicular to the workplane and if horizontal is taken to be parallel to the workplane.  To get global horizontal and vertical movements, the angle of the workplane would have to be considered, as would the cross-section orientation (Normal vs Horizontal) since each case would require different equations.  Since this topic seems to be complicated enough, I will not go into any more detail on non-horizontal workplanes.

Given my affinity towards math and families, I would love to be able to incorporate these equations into the framing families (since the equations are valid for a 0 degree rotation too), but of course none of these parameters are available until after the element is loaded into a project, so I will put that on hold for now….but I reserve the right to revisit this idea!
Replacing Revit Toposurface

A question came up the other day that is worth a blog post.  My client had created a quick topography from a CAD link that was a preliminary surface.  He had created pads so that the views would look correct.  He now had the new CAD link and wanted to know how to update his surface with the new file.  Unfortunately Revit doesn’t update the surface created from a linked CAD file when the new CAD file is updated.  The trick is to edit the topo surface, delete all the points and then recreate a new surface from the layers in the linked CAD file.   This way Revit keeps the same ID number and building pads can remain to cut out the surface.  However this is one crazy thing that happens when trying to do this, if you delete all the points a warning will come up “A Pad can’t extend beyond the edge of a Toposurface“.  I create a few points that are at a crazy high elevation just around the pad, (by crazy I mean 1000′ or 2500m above the current surface)  then I can easily delete all the points that are at a real elevation in a 3D file.  Once I create a new topo surface from the new CAD link I can delete the points that are generating the huge mountain.  Unfortunately any site component, i.e. trees, parking spaces, etc.  wont update to the new surface.  They will have to be selected and a new host will have to be selected.


Sheet Issue Dates

One common thing I see in a set of Construction Documents is a schedule that displays all of the dates each sheet was issued on, either with a dot or symbol of some sort.  This is usually done with a project parameter for each release date and then someone has to manually go through and mark each sheet for the date it was issued.  I have seen a few different add ons for this to work but here is a nice little tip to use if you don’t have an add on.

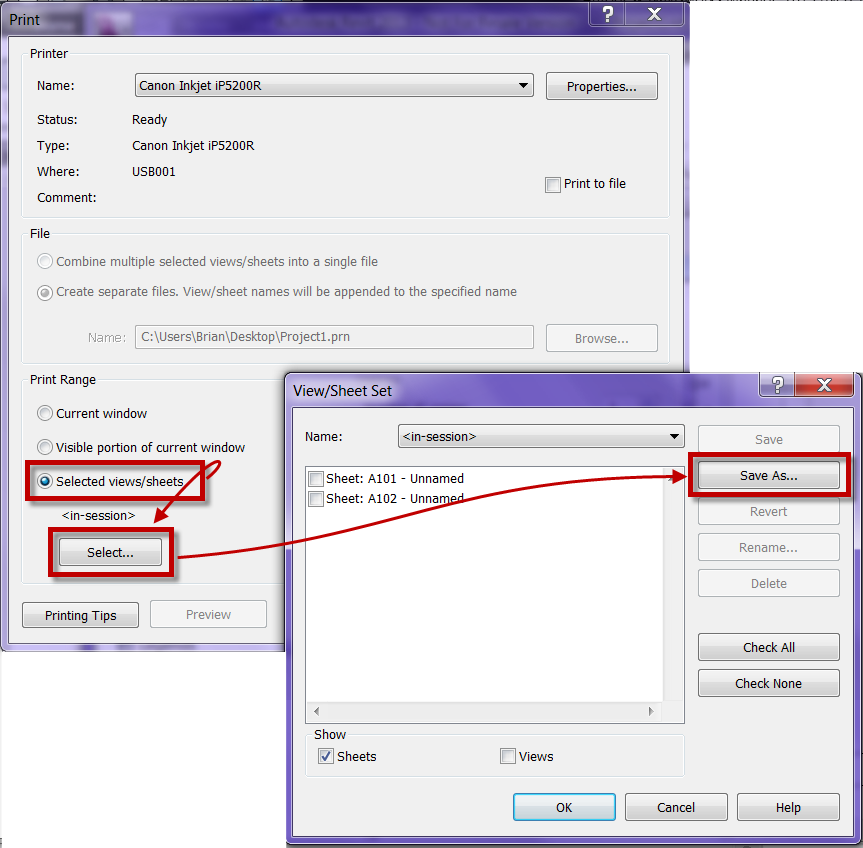
The trik is to create a Sheet Set and then use that sheet set in the browser organization to multiselect all the sheets.  To create the sheet set go into the print dialog and choose to print by “Selected views/sheets” select all the sheets that are part of the print set and do a “Save As…”


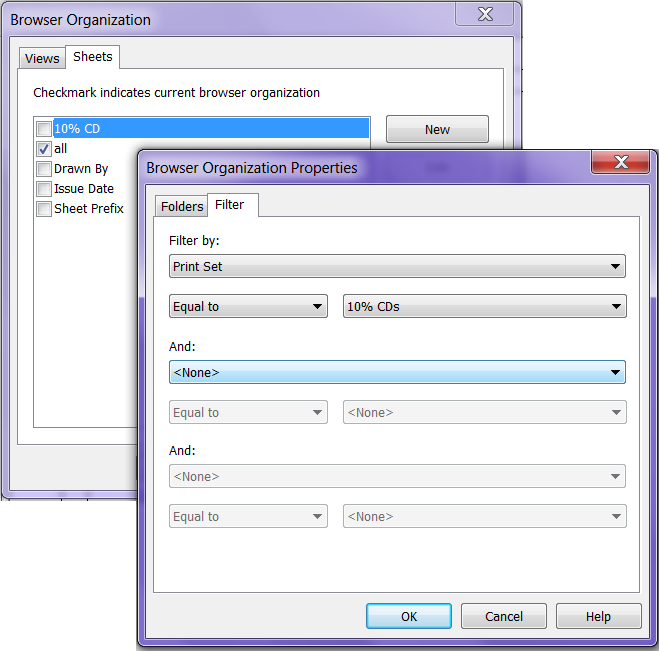
Once a sheet set is created this can now be used for Browser Organization.  The browser organization for sheets can now be set to Filter By “Print Set” (note: in the print dialog this is called Sheet Set not Print Set). 

Now only the issued sheets are available in the browser making it easier to select them all at the same time and check the appropriate project parameter field.


Navisworks opening Revit 2013

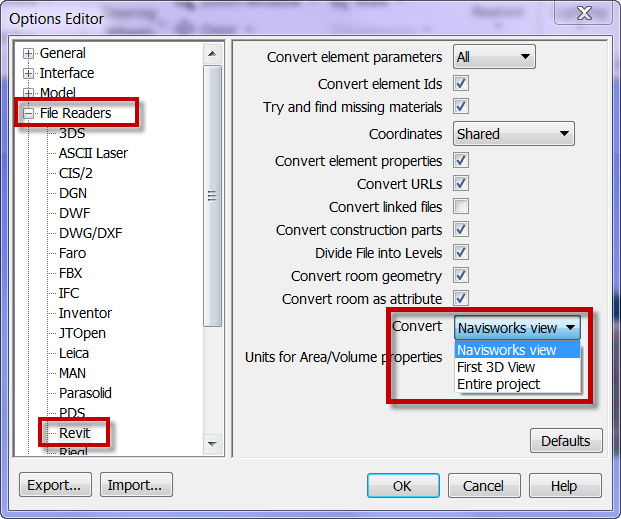
In 2013 Navisworks has the capability to open native Revit files.  The question that arises is how does it know what view in Revit to open and what does it import?  They way this is handled is very nice and once understood pretty self explanatory.  In the Navisworks file Reader options there are some settings to pay attention to. 

The Convert setting is used to determine what view Navisworks refers to, to find what to import.   If it is set to First 3D or Navisworks view it will not only look to what is visible but also the level of detail.  If it is set to Entire Project then everything in the file will come through. 

What is the difference between Navisworks view and First 3D view you ask,  if the Revit file has a view with the name “Navis” and Navisworks view is chosen then it will look to that view for what is visible and what the detail level is set to. If it is set to First 3D view it will use the first 3D view that was created in your Revit Project.

I also choose to not select “Convert linked files”  I would rather bring in each linked model file on it’s own.

Linked AutoCAD Files – Layers

Recently a question arose about removing layers globally from a linked AutoCAD file inside of Revit.  The user had went into Object Styles, Imported Objects Tab and then expanded the file for the .dwg file then proceeded to delete the desired subcategories for object styles.  This sounds like a completely legitimate way to go about this, with any Revit category if the subcategory is no longer needed then we simply delete them.  In the case of a linked AutoCAD file this is not the right way to go about this, the end result will delete the undesired layers but all of the arcs, lines, circles and text will remain in the file. I found this interesting and a bit of a surprise.  If those elements in the CAD file are queried  the will be un-associated to a layer therefore making it impossible to remove them out of the Revit file.  Instead select the CAD file and use the Delete Layers option, this will remove the layers AND all of the associated elements form the entire file.