Tag Archives: Tips

Default input of inches

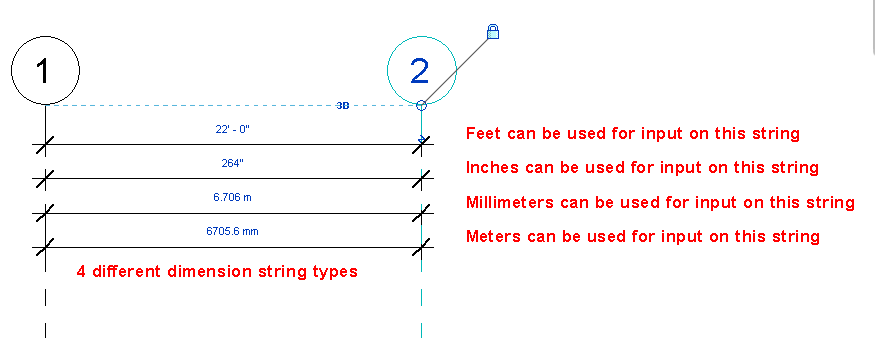
I always get the question asking can you change the default value for input from feet’ to inches” in Revit.  I always let users know that the input is what ever your projects units are set too, so Feet and Fractional inches will default to feet for input, however change the default setting to simply fractional inches and that will be the input (same in true for meters vs millimeters).   I let users know that they don’t have to use the ‘ and ” symbols, instead use the space bar or if you are a ten key person then use the hyphen key (1’6.5″ or 1 6.5 or 1 6 1/2 or 1-6.5 or 1-6-1/2).  At our ROMBiS meeting, our local BIM user group, a great tip came up about having a dim style set to inches thus allowing a user to type in inches with out having to use any of the tips above, no matter what the project units are set to.  The disadvantage of this is a permanent dimension string will have be associated with the element before it can be used for input.

There is also an old tool called Revit InchWorm if you wanted to check it out, I personally haven’t used it in a very long time so not sure how well it works with newer releases of Revit.

Schedule only Linked Items

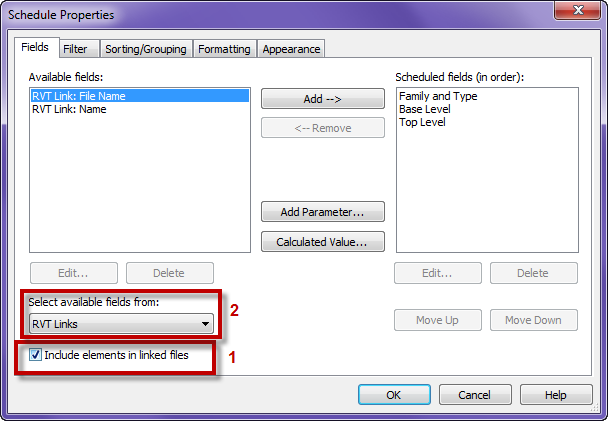
The question of how to schedule only elements from a liked model has come up a few times so I thought it would make  good post.  The first trick is to understand how to schedule items from a link, this is a simple process of checking the box in the lower corner of the schedule properties (1).

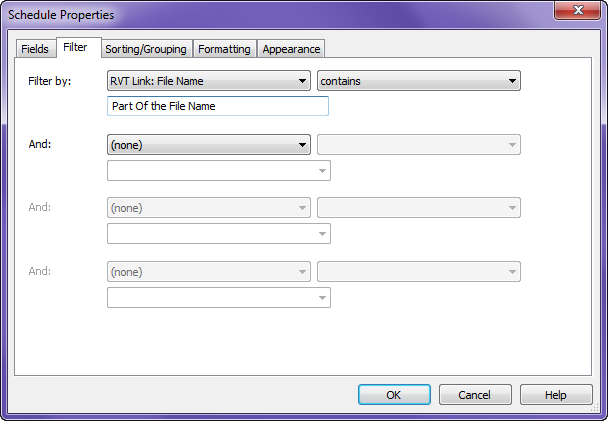
Once this has been checked there is now and option Select Information from RVT Links (2) Select “Revit Link: File Name” and add it to the fields.  Now in the Filter tab it can be set to contain part or all of the name of the linked model.


View Templates and Area Plans

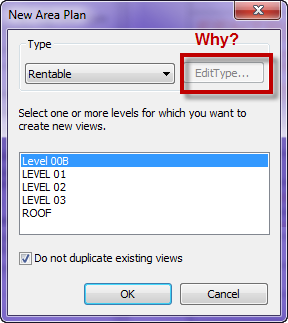
In previous posts I spoke about the great new features, and some cautions of view types and templates in 2013.  While setting up area and code plans I noticed that there is a slight variation in how to assign view templates to area plans.  Since area plans are accessible via the View >> Plan View drop down the capability to edit the type properties isn’t there.  However they can be created by going to Architecture >> Area >> Area Plan, however the Edit Type button in the New Area Plan dialog box is greyed out.

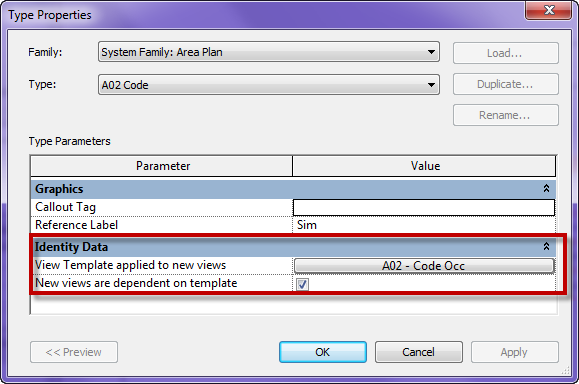
If you select an Area Plan that has already been selected the Type Properties can be accessed, this is where the default view template associativity can be set.

Structural Framing Tags: Level vs. Sloped

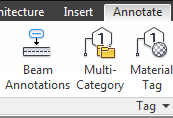
When using the beam annotation (Annotate tab, shown below) tool to quickly tag many structural framing elements, there are a couple quick tips that are good to remember.

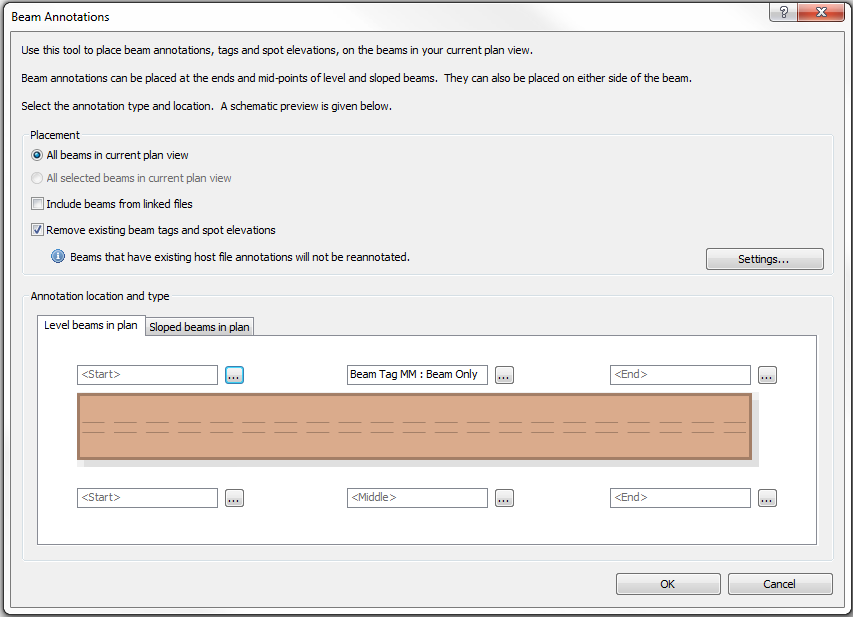
First, note that there are two tabs: one for level beams and one for sloped beams, see the image below.  In all honesty, I cannot think of too many situations where one would want completely different tags on level versus sloped beams, but the option is there.  So, if this tool is used and tags don’t show up, check that the correct tab was utilized.  Also note that if a tag is assigned to a level beam and then later that beam is sloped (or vice versa), the tag will remain the same.

The other items to note are under the “Placement” options in the dialog shown above.  There are several options available, so make sure to select the appropriate one, otherwise tags can be overwritten, missed, etc.

Schedules and Phases

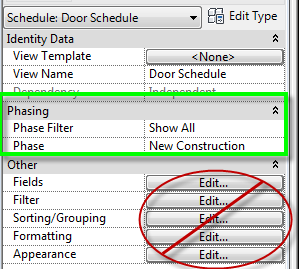
The question comes up a lot how does the phase of a schedule get changed to the correct phase or to display no phases as all.  The first time I attempted to do this I searched high and low in all the different tabs in the schedule properties dialog, only to find it is just like any other view and this can be changed via the standard properties dialog within Phasing via the Phase Filter and Phase, crazy enough it is right above where I picked Edit to get to the Schedule Properties dialog box.

The Phase value should be set for the phase that is going to be scheduled, and if all that is to be scheduled is stuff to that phase than the Phase Filter should be set to “Show New”, this setting will only schedule items to that phase.  However if everything is to be scheduled the set the Phase to the last phase on the project and set the Phase Filter to “Show All” this will schedule all non-demoed elements in the file.  Of course these are just some of the different options on how phasing can work in schedules.