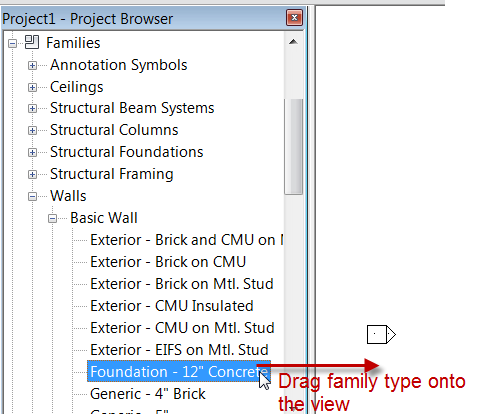
When placing families in a project most everyone knows that you can go to the command you need to place a file. For example if you want to draw a wall then you go to the wall command, if you want to place a component then the component command. That is pretty self explanatory, however not everyone knows you can use the project browser to place families. Simply go down to the families area, browse the family type you need and drag it onto the screen, if that family is a type that can be used directly into a command then it will start that command. If you try to drag a baluster or elevation symbol on screen it wont really do anything, if you drag any tag family onto the screen then it starts the tag command and it doesn’t matter which tag you drag.
Tag Archives: Basics
Revit Basics – User Interface
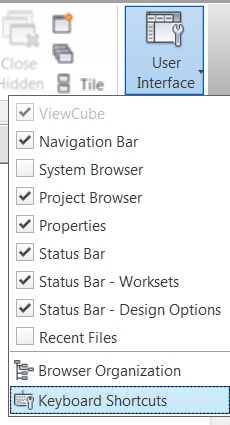
During every training session this question comes up multiple times. “How do I get my Project Browser (or Pr0perties, or Zoom dialog thingy) back on the screen. If you accidentally turn off any of these they are easily brought back by going to the View tab >> Windows Panel >> User interface drop down and rechecking what you want back on. You at anytime can bring back the Recent Files screen that is shown when you open Revit with this as well.
Rotate with Origin
I was asked the other day by a user, a frustrated user, how come you can’t go right into the rotate command and place the center rotation point? Well you can easily do this with a keyboard shortcut by default the keys are R3, if you want to change the default the command name in the Keyboard Shortcuts (KS) the command name is “Define a new center of rotation”.
Revit Basics – Temporary Dimensions
This is an excerpt from an article that I wrote for AUGIWorld.
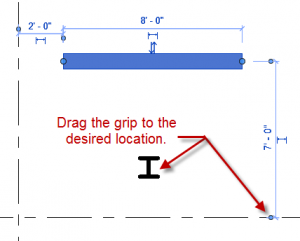
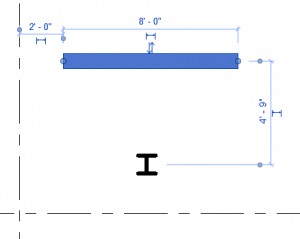
When selecting an element, beginners are taught that the little blue dimensions that appear are temporary dimensions. Unfortunately the temporary dimensions do not always show dimensions between the elements we would like. To change this, grab the little blue dot and drag it to change the witness line. In addition, for some elements such as walls and columns, clicking on the grip will cause the dimension to cycle from face, to centerline, to the other face.
Here are two bonus tips about temporary dimensions: First, in the graphics tab of the Revit options in the application menu (the big R), the size and opacity of the temporary dimension text can be edited. If it is too small or is being obscured, simply change the options.
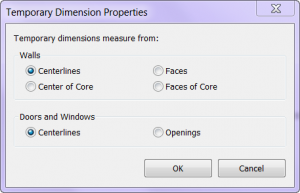
The second bonus tip is that the default locations of temporary dimensions can be changed under Manage Tab: Additional Settings: Temporary Dimensions. This is useful if a user would prefer always to dimension wall faces and/or opening widths instead of their centerlines.
Revit Basics – Selecting a Detail Bubble
For several reasons Revit users will often want to show only the bubble portion of a section cut or a callout. For example, they want a bubble shown thus:
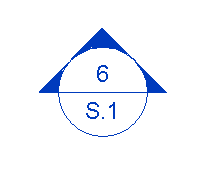 This is normally achieved via pulling the tail in very close. Unfortunately, that part of the bubble is what one would click in order to select the section cut (since clicking on the bubble itself will not work). There are a few ways to get around this, some more common than others.
First, one might draw selection/crossing window to select the bubble. This will work, but might cause other objects to also become selected.
Second, using the omnipresent tab method to tab to the bubble will work.
Finally, perhaps the least known solution, holding down the control button will allow the bubble to be selected by clicking it.
This works with all veiw types including Levels, Sections and Callouts.

