While working with a client this evening (yes on a Friday night…. my name is Revit Geek after all) we discovered something I didn’t know. If you have ever tried to rotate a crop region and the rotate command is greyed out, that is because your view is set to True North. Apparently crop regions can only be rotated when the view is set to Project North. This did make sense once I thought about it, if your view is set to True North why would you want to rotate it away from that. If you are wondering why we were trying to rotate the crop region it was due to the fact that the plan didn’t fit on the sheet. If you use the “Rotation on Sheet” value the view title rotates with the view. However if you rotate the crop region in the original view then it is rotated on the sheet and the view title remains in its’ normal location.
Category Archives: Platform
Wall location lines
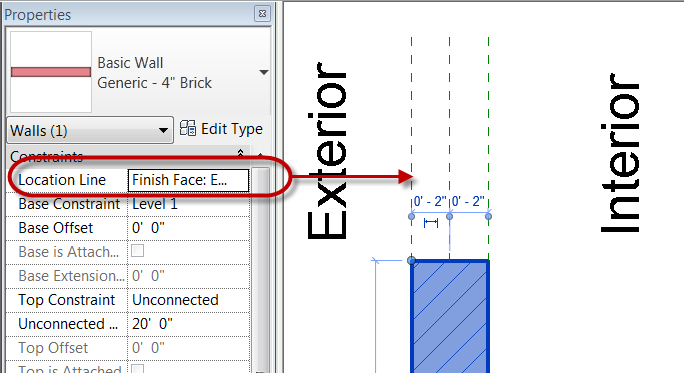
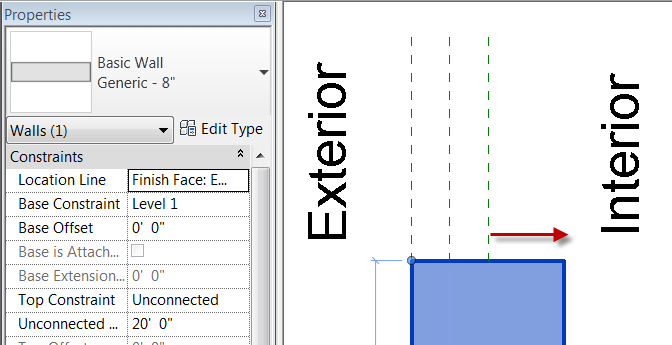
So a post over at Linked In today got me thinking about walls. When I have clients start off a project they usually start with some sort of generic wall type, then as the project develops the walls get changed out to be something a bit more specific. Not everyone knows that when a wall type is changed it looks to the location line to know where to adjust from. So if you change a wall and its’ location line is Wall Centerline then it will grow or shrink equally on each side, if the location line is Finish Face Exterior then it will grow completely to the inside.
When changing the exterior walls that need to grow to the inside. Select all the walls that need changing and change the location line appropriately. This way it isn’t a crap shoot to find out if they moved in, out or equally. When changing all of one wall type, use the “Select All Instances >> In Entire Project” tool to speed up the process.
Autodesk Project Browser Research / Collapse Project Browser Tip
The folks over at The Factory are wanting input from all of their Revit users. They are wanting to see a screen capture of your project browser and the properties of it. I would suggest collapsing the tree to just the structure and not the individual views (see tip below on how to do this easily). Go to this post to help them out and possibly make future versions of Revit more to your liking.
Browser Tip:
If you need to quickly collapse the Revit Project Browser then simply change the Browser oganization in the Type Selector to a different one then change it back this will collapse all. If you want to expand the entire Project Browser then hit the * key when on the Views or Sheets.
Elements mysteriously moving
I find that at least once a week, users get frustrated with Revit because elements mysteriously move and they have no idea why. Then I ask if they know what the little check box on the bottom right corner of the screen is?
The Press & Drag radio button,which is on by default when you install Revit (programmers please change this), allows you to click on an element and drag it all in one motion. As defined from the help file “TipWhen moving elements one at a time, select Press & Drag on the status bar to drag an element without selecting it first. When using this option, the element is selected as you drag it.” So when you think you are going to do a selection or crossing window you end up moving elements around instead. I know everyone out there has had this issue at least one time or another. Simply un-check this dialog box and the random moving of elements will more than likely stop. Revit should remember that this has been turned off so next time when you open Revit it will still be off, however if Revit crashed more than likely it will be on again when you restart.
If you are at a firm where you deploy Revit and would like this changed for all users you can edit the deployment so that the Press and Drag is turned off automatically for users. See this post at Revit Clinic for more details.
Copying from a linked Revit file
So this has come up a bunch in the last few weeks so I thought it was worth mentioning. If you need to take a get a family from a model that you have linked in copy paste and Tab is the trick. Continue reading


