Category Archives: Platform

Vasari 2.5

So I was waiting to post about Vasri 2.5 until it was officially released, well that happened today.  For those of you who haven’t downloaded Vasari yet or know what it is I highly suggest you do it.  Vasari is based on Revit and allows users to create masses, adaptive components and curtain panel by patterns.  But that is just the beginning users can also do early analysis on the masses including: wind analysis, solar radiation plus energy and carbon analysis.  All of which are extremely helpful in the early conceptual design of a project.  Once the final decisions are made the Vasari file can simply be brought into Revit and developed further.  Release 2.5 adds Editable perspective views, Improved automatic zoning for energy models and New extrude face tool. 

Download and read the information here

http://wikihelp.autodesk.com/Vasari/enu/TP25/Help/0000-New_in_P0

http://wikihelp.autodesk.com/Vasari/enu/TP25

or visit http://projectvasari.com/ for discussion forums and other items.

Select by ID

A few days ago, a coworker asked for a way to locate every instance of a family (in this case it was a detail component family).  His goal was to delete all instances and the usual process of selecting all instances in the project and hitting delete occasionally does not in fact delete all instances so he wanted another way.  He had considered scheduling the instances and then deleting, but not all elements can be scheduled.  This particular issue gave me a chance to suggest one of the useful command that I believe tends to be forgotten.  The following is the procedure I suggested for locating all instances of a given family, regardless of the ultimate goal (deleting, changing or simply finding them all).


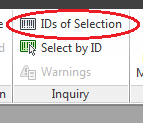
Start by selecting one instance in the project or the family in the project browser, right click and select all instances.  Then, in the Manage tab, select “IDs of Selection”.

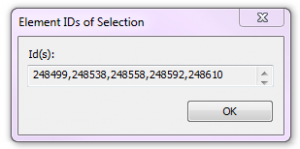
This will bring up a window showing the element IDs of all of the selected elements.

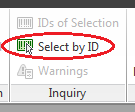
Highlight all of the IDs and copy using Ctrl + C.  Then click OK and go back to the Manage tab and select “Select by ID”.

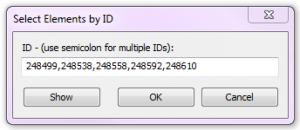
In the window that appears, paste the IDs that were copied to the clipboard using Ctrl + V.

Finally, click Show and the project will cycle through the elements, locating them and showing them.

Side note: if these items are needed for future selections, and you are working in Revit Structure, you can save the selection (also on the Manage tab), or if you are not in Revit Structure, paste the IDs into a text file for future use.

Revit Basics – Temporary Dimensions

This is an excerpt from an article that I wrote for AUGIWorld.

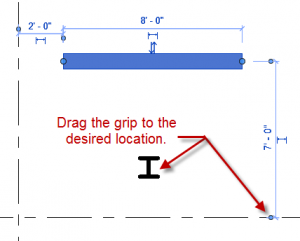
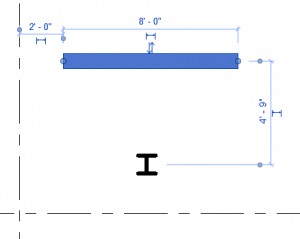
When selecting an element, beginners are taught that the little blue dimensions that appear are temporary dimensions.  Unfortunately the temporary dimensions do not always show dimensions between the elements we would like.  To change this, grab the little blue dot and drag it to change the witness line.  In addition, for some elements such as walls and columns, clicking on the grip will cause the dimension to cycle from face, to centerline, to the other face.

Here are two bonus tips about temporary dimensions: First, in the graphics tab of the Revit options in the application menu (the big R), the size and opacity of the temporary dimension text can be edited. If it is too small or is being obscured, simply change the options.

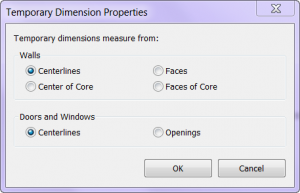
The second bonus tip is that the default locations of temporary dimensions can be changed under Manage Tab: Additional Settings: Temporary Dimensions.  This is useful if a user would prefer always to dimension wall faces and/or opening widths instead of their centerlines.

Rotating View Title

When placing a view on a sheet there is the option to rotate the view 90 degrees clockwise or counterclockwise, unfortunately this also rotates the view title.  So how do you rotate the view with out rotating the title?  The answer is to not rotate the view but to rotate the crop region of the view back in the original view, then when it is placed on the sheet it will work the way you were wanting.

Revit Basics – Selecting a Detail Bubble

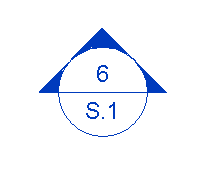
For several reasons Revit users will often want to show only the bubble portion of a section cut or a callout.  For example, they want a bubble shown thus:

This is normally achieved via pulling the tail in very close.  Unfortunately, that part of the bubble is what one would click in order to select the section cut (since clicking on the bubble itself will not work).  There are a few ways to get around this, some more common than others.

First, one might draw selection/crossing window to select the bubble.  This will work, but might cause other objects to also become selected.

Second, using the omnipresent tab method to tab to the bubble will work.

Finally, perhaps the least known solution, holding down the control button will allow the bubble to be selected by clicking it.

This works with all veiw types including Levels, Sections and Callouts.