Category Archives: Revit

Revit Posts

Displaced Views used Internally

I recently was at the second RTC Europe conference, (the reason for not having a post last week) as usual it delivered with good content, exceptional speakers and of course an all around great experience.  Having it in a castle was an enjoyable experience not to mention the extra time we took to tour most of Ireland.

As usual there were great sessions, sessions on Dynamo, Reality Capture, Families and the list goes on.

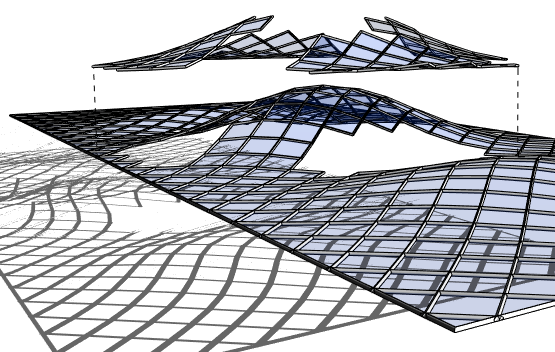
One tip I cam out with was during a session Havard Vasshaug was presenting on Dynamo.  The tip had nothing to do with Dynamo rather something he briefly showed to emphasize his point and made me think of how to use it in daily practices.  It was his use of displaced elements, he had moved away a few elements to show what he was working on for the delegates to see easily.

RTCEU_2014_Havard

This made me think that when trying to show a client or other team mates certain elements that are hard to focus on, or when simply trying to remember where you left off before a long holiday weekend.  Create a view and displace elements that you need to focus on or remember to update at a later date.

Revit Basics – Group Origin Points

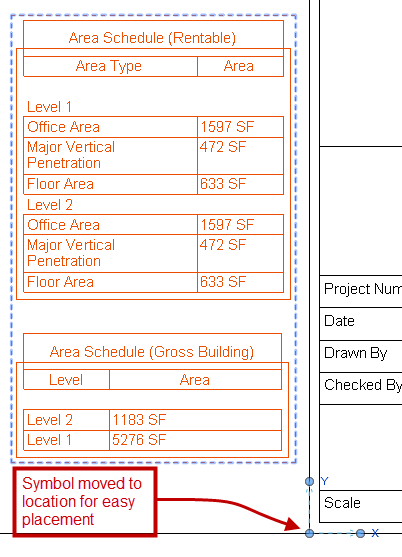
I am not a big fan of groups I tend to think they get over used in lieu of families, but this post isn’t going to get into that.  With that said there is a time and place for their use and when they are being used I think there are a couple of tips that I see commonly overlooked.  The simplest tip to discuss is the groups origin point.  When a group is created it will place a symbol in the center of the objects being grouped, this symbol is the origin point.  This symbol is used not only for the origin point when placing the group but also as the origin when the group is being changed from one type to another.  To adjust where this is located simply select the group and drag the symbol to a location that is better than the random center(ish) area of the group.  This way placement of the group is easier as well maintaining it’s placement when the group type is changed.

Group_InsertionPoint

In the image above a group was created for alignment of several schedules onto sheets, the “Group Origin” was moves such that is could easily be snapped to the title block.

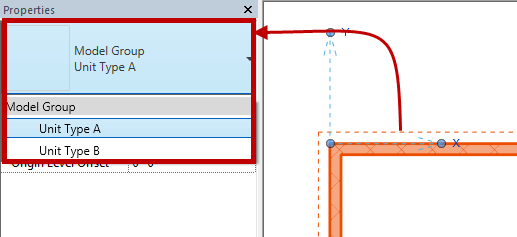
Another tip is the fact that groups can be changed just liked any family.  If a group is selected it can the be changed via the “Type Selector” just like any family.  This is why it is important to pay attention to the “Group Origin” as stated above.

Group_TypeSelector

Last tip for the day is if you are only using a group one time consider ungrouping it and purging the group out of the model.  It is a known fact that groups will slow Revit down especially when they are over used.

Revit Basics – View Range

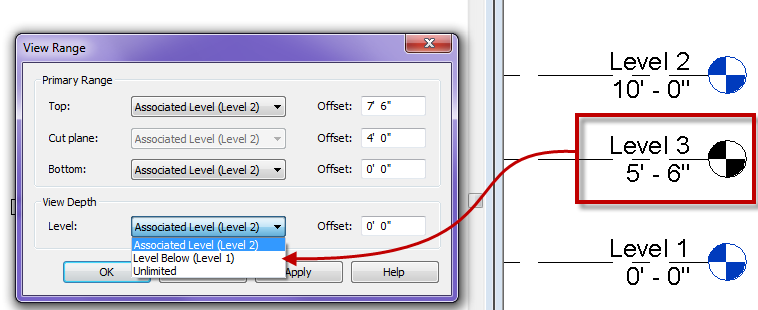
Over the years I have had the question come up on why a level can’t be used as an underlay or be selected for view depth or bottom while in the View Range command.  ONLY levels with a view associated to them can be used in these situations.  If a level needs be generated and used for one of these options just add a plan view, so it can be used.

Level_NoView

Generic Annotation Bug

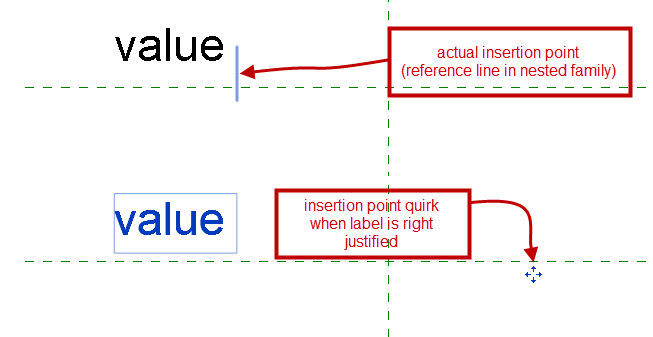
While working with a family to resemble a Level head for detailing I noticed a quirk when dealing with Generic Annotations and justified text.  I had nested in a Generic Annotation family that only had a right justified label, this was nested into another generic annotation family.  What I discovered is right justified labels in a generic annotation family will end up moving the control point if there isn’t a line in the family.  This is odd because when the label is center or left justified the insertion point remains constant.  I traced this issue back to Revit 2012, can’t believe I hadn’t discovered this issue previously.

Generic_Annotaion_Quirk

To resolve this situation a line needs to be added to the family, I personally just added an invisible line on the vertical reference plane, such that it was easier to find if the label was blank.


Scope Box Quirk

When placing scope boxes they will come up with a default name Scope Box ??, where the question marks are a number.  If you rename a scope box to say Area 01 then use the scope box command to place a new one, it will come up with the name Scope Box ??.  However if you copy a scope box it will have a value one higher than the previous, so a copy of Area 1 will be Area 2, the same is true if the name was Area A it will be Area B.  So if there are going to be a multitude of scope boxes on the project think about renaming the first one and copying it around, easier to adjust shape than rename, or at least that is how I do it.