A question came up on why material tags weren’t working on this upgraded file from Revit 2012 to Revit 2013, the problem wasn’t in an upgrade it was in the Visual Style assigned to the view. Certain commands inside of Revit don’t like the view to be in wireframe. In this case the we were dealing with material tags, other tags such as spot elevations also don’t like wireframe. Once a view is changed to wireframe the surface of all elements cease to exist and only the bounding edges are there. If there isn’t a surface to tag there can’t be any materials on that surface, so tools like material tags don’t have anything to tag. This is similar to spot elevations, however a spot elevation can see the edge of an element and tag that.
Revit Weight Warning
I have posted in the past about crazy warnings that Revit will give us. I am still trying to figure this one out, are the programmers hacking my webcam and calling me fat? Or is my building going to somehow throw off the earths gravitational spin if the model is actually built? So many ways to interpret this dialog.
By the way this dialog box came up for me as I was creating a new local file via the open command off of a Revit Server.
2013 Stair and Handrail Quirk 2
As I am setting up my new template for 2013 I will be posting all the little quirks I find so everyone doesn’t have to bang their head on the keyboard as I am doing.
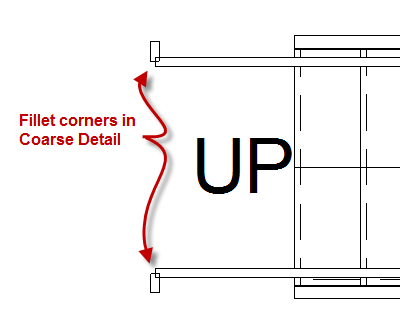
At first glance these tools look great, however once you get into the nuts and bolts of them you will find many different quirks. Today’s quirk is with the Handrail Type and Top Rail and how they display, or how they don’t display. One of the values both of these have in common is the capability to have a fillet radius at all the joints. A really nice feature for this release, however the plan views don’t display them, unless the views’ detail level is set to Fine. Note this is only for PLAN views, all other views display them correctly.
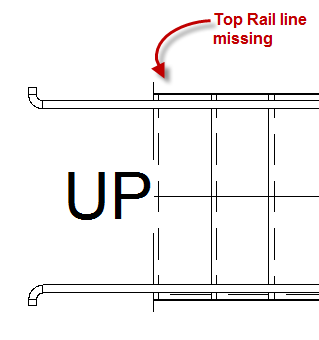
Be cautious however, because sometimes the top rail will disappear when these are adjusted. I haven’t found the exact reason why this happens, I am still digging into this issue.
I don’t want all of my plan views to display in fine so I wanted to show a Visibility Graphics tip to everyone. The far right column of the Visibility Graphics dialog box allows for an individual category to be set as desired. For Rails in 2013 I have set this to be Fine so that all fillets will be displayed in plan views.
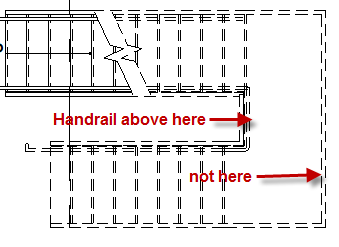
I also am puzzled at the inconsistency of when rails above are being displayed. In the image below you can see in the inside handrail is displayed all the way up the stair, however the outside rail disappears at the landing.
If anyone has a solution to any of these quirks please comment and let myself and the world know.
2013 Stair and Handrail
While setting up a new template for one of my clients I noticed an interesting issue (I would call this a bug) with handrails and precast stairs.
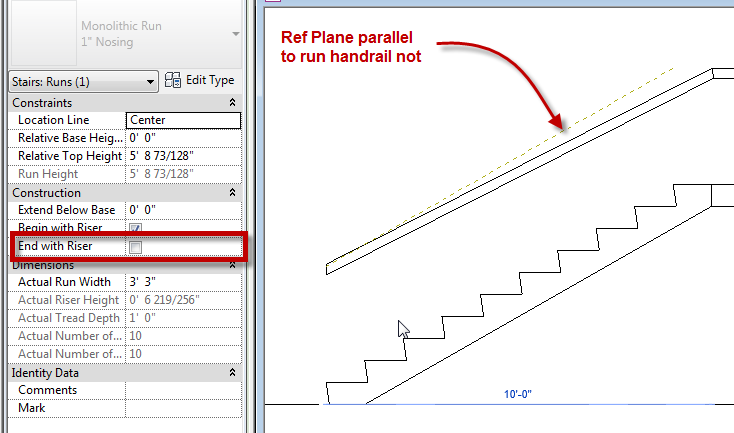
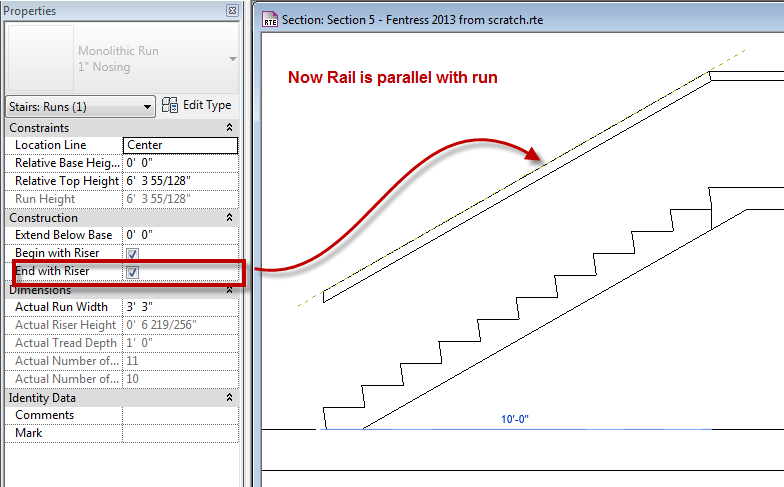
In Revit 2013 one of the small changes to stairs was the “End With Riser” (as well as “Begin With Riser”) value was changed to an instance based value. When creating precast stairs this value is unchecked by default. The issue is not with the stair itself rather with the handrail that is created. When this value is unchecked the handrail does not remain parallel with the run of the stair.
Once the “End with Riser” value is checked the rail becomes parallel again.
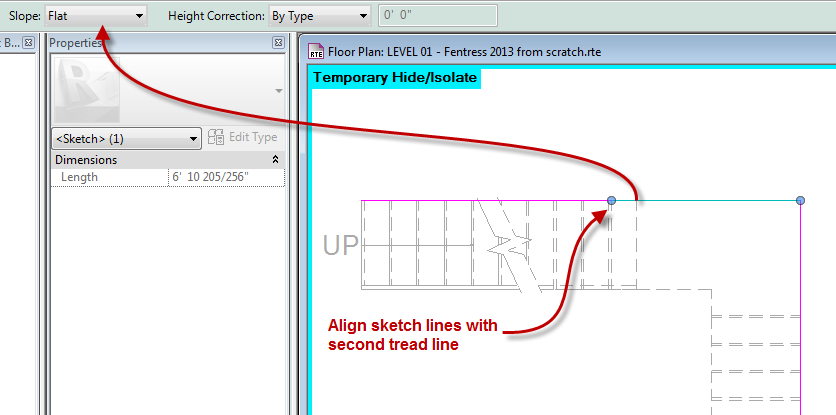
So how do we resolve this issue if we need the run to not end with a riser. Edit the path of the rail and make the lines align with the top tread of the stair, then select the sketch line at the landing and make the value for it to be flat.
I have submitted this to Autodesk and hopefully we will get a good answer back. Or at least have the issue resolved in a service pack.
Plan View Types Part 3
I have posted a few times now about the Revit 2013 new Plan View Types. I really like this feature, however I found another nuance that everyone should be aware of and hopefully will change with future service packs or releases.
At first I loved the fact that when levels were created it allowed the Plan Views to all have the same name if they were under different view types. I still like this, however it seems to be causing issues.
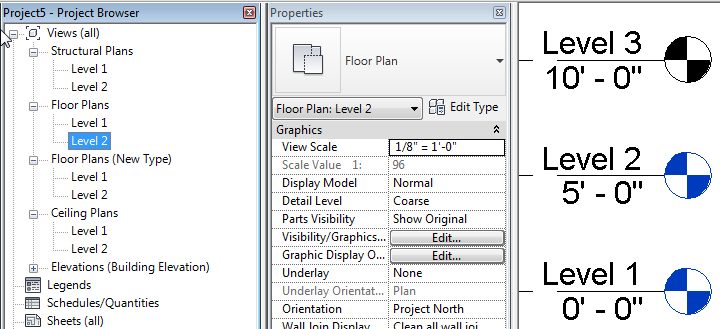
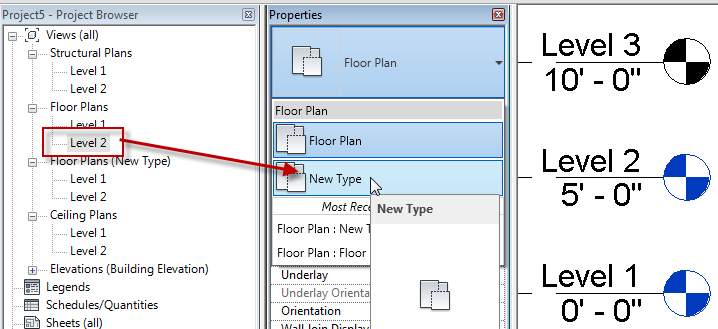
Notice in the image below I have Level 1 and Level 2 views in each plan view type. This is great now if you rename a level or view the capability to rename all of them still exist.
Now simply move a view from one category to another.
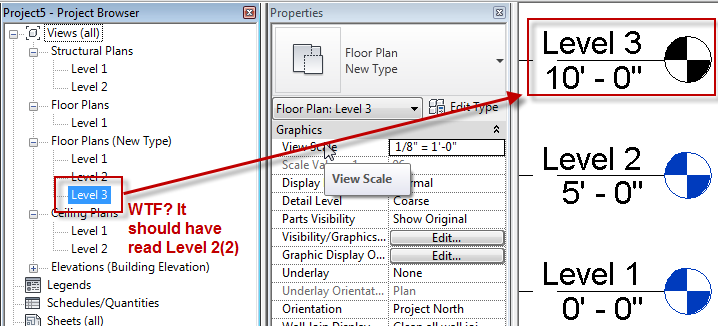
If that view name already exists then it doesn’t add another number at the end, it simply add up to the next available number. Which seems totally non_Revit like in my opinion why not a (2) at the end?
I wanted to make everyone aware of this issue. I have already been discussing this with clients to see how they want to impliment and deal with this issue.
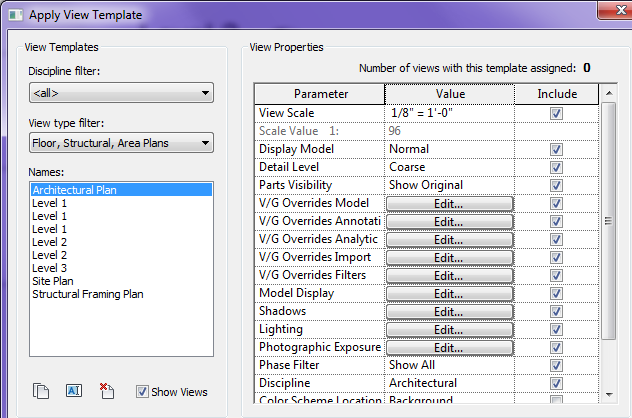
Small nuance that could be frustrating however not devastating to a project. If you want to apply a view template via another view and all of the plan views have the same name how do you choose? As you can see there are numerous Level 1 views.

