Continued from..
Adaptive Component – Everyday Uses part 4 Adaptive Component – Everyday Uses Part 3 Adaptive Component – Everyday Uses part 2 Adaptive Component – Everyday Uses part 1Roof Cricket Family
This section of the handout will give step by step instructions to create a variation on the roof cricket family.
- Start with the OOTB GenericModelPatternBased template
- Draw a point directly on top of adaptive point 2, making sure the Z work plane is used as the workplane
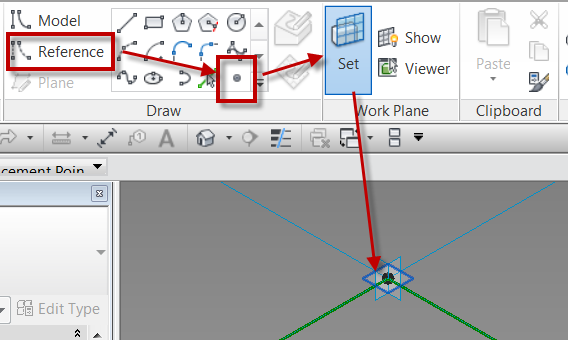
- Start the Reference Point command
- Use the Set Work Plane command
- Tab to get the horizontal work plane on point
-
- Select the recently placed point
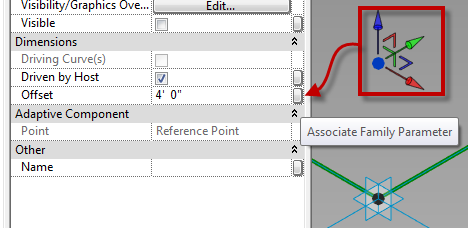
- In properties change the “Offset” value
- Select the “Associate Family Parameter” button
- Create a new parameter named “Rise”, and make it instance based
-
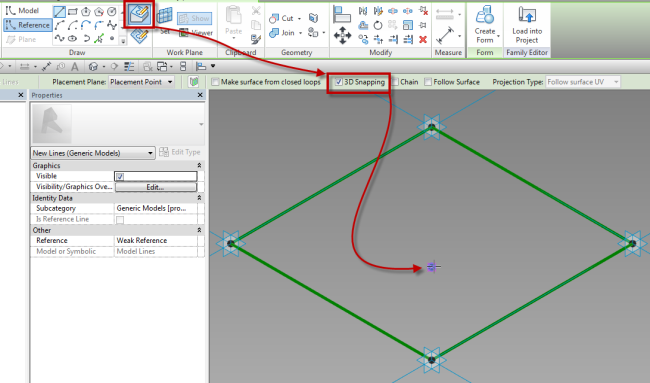
- Draw a reference line between the newly created point and adaptive point 4, making sure the Draw on Face selection is highlighted and 3D is checked in the options bar
- Draw a reference line from adaptive point 1 to the new reference point
- Draw a reference line from adaptive point 3 to the new reference point
- Draw a reference line from adaptive point 2 to 4
- Set the work plane to be the horizontal plane of the diagonal reference line
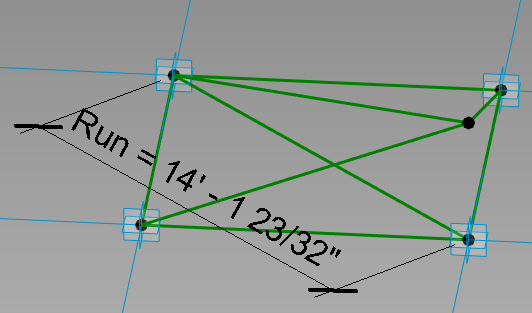
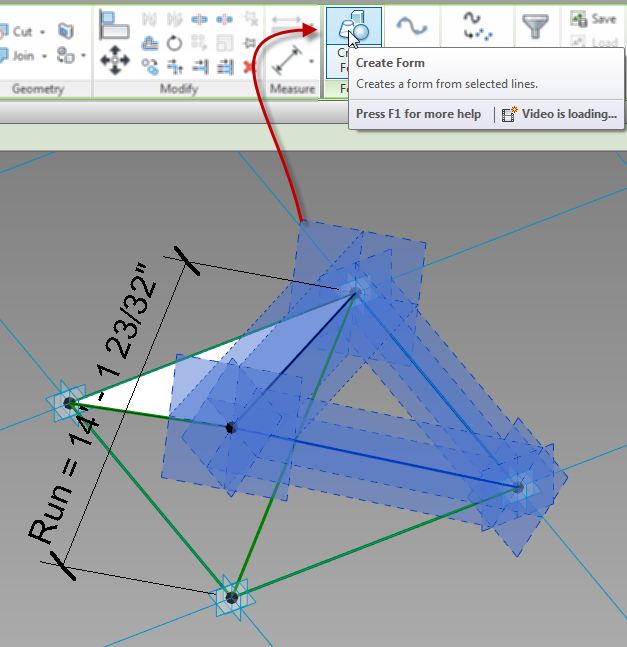
- Place a dimension from adaptive point 2 to 4 (make sure adaptive points are being selected)
- Label the dimension with a new reporting parameter and call it “Run”
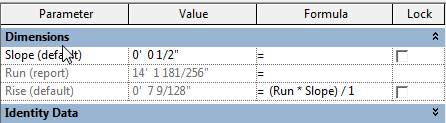
- Open the Family Types dialog
- Create a new instance based length parameter, label it “Slope”
- Add the formula “(Slope*Run)/1”
- Select three of the upper reference lines
- Select the create form button
- Select the surface option
- Repeat for the other three upper reference lines
- If desired, add a material parameter to the surfaces
- Save the file