Yearly Archives: 2016

Revit Properties Organization

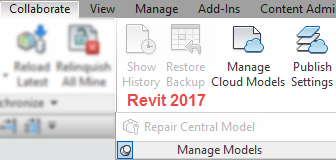
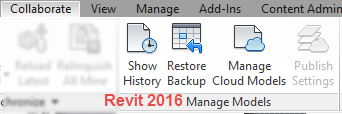
When creating code schedules and plans today for a client I realized I didn’t like the way I have previously grouped project parameters in the past.  For this reason  I thought I would discover how Revit organizes the properties groupings. For years I have always told content developers to put parameters they don’t want users to access under the “Other” area of “Group parameters under:” because it is at the bottom of the list. Today I thought I should actually test to see if that information was is still true. I am proud to say that I was correct Other is at the bottom of the properties list. Below is an image of how the properties dialog is organized for Revit 2017 (Revit 2016 did not have the “Set” option available).  I hope this information will assist when decided where to place parameters.


In the event you would like to have the text for internal purposes here it is.

Constraints
Construction
Rebar Set
Set
Graphics
Text
Materials and Finishes
Division Geometry
Electrical
 Engineering
Electrical – Lighting
Electrical – Loads
Segments and Fittings
Plumbing
Mechanical
Mechanical – Flow
Mechanical – Loads
Structural
Layers
Slab Shape Edit
Primary End
Secondary End
Dimensions
Analytical Model
Analytical Alignment
Releases / Member Forces
Structural Analysis
Forces
Moments
Identity Data
Phasing
Energy Analysis
IFC Parameters
Fire Protection
Title Text
Green Building Properties
Photometries
Analysis Results
Model Properties
General
Electrical – Circuiting
Data
Visibility
Overall Legend
Other

Revit 2017.1 Perspective View

One of the new features of 2017.1 is the added capability to work in perspective views.  This has been a nice feature as it allows for most tools to be used as well as temporary dimensions are displayed when things are selected.

A nice added bonus that I just noticed is the fact that add in utilities can now be accessed when in a camera view.  I have been frustrated not being able to access Enscape while in the view I want to be using.

Revit 2017.1 Changes part 2

Yesterday I posted about some changes to 2017.1 as they reflect on Collaboration for Revit.

This morning i stumbled upon another more minor change.  This change was on the Collaborate Tab and selecting the Manage Models panel:

The first was a drop down to the panel itself, once opened you will see the new feature of “Repair Central Model”, this is a new feature for all workshared model not specific to C4R.  The other

2017-1_c4r_mangemodels

Below is an image taken from Revit 2016 for comparison

2017-1_c4r_mangemodels2016

Revit 2017.1 C4R Changes

Yesterday Autodesk released the latest update for Revit 2017 (direct download links can be found at Luke’s Blog).  A couple of changes have happened if you are using Collaboration for Revit.

One of which is the new branding from A360 to BIM360.  In the Open dialog box the icon has changed. (this is also true when SP7 for Revit 2016 is installed as well)

2017-1_c4r_open

The more significant change is the Synchronization process, below we can see the status of the process in a dialog box (wish this was there for normal projects as well)

2017-1_c4r_synch

Two changes I have noticed with in a few minutes of using the updated version

Revit 2017 Ceiling Change

In previous releases of Revit we have been able to automatically place ceilings in rooms in most instances.  In 2017 the reasons for not being able to place rooms automatically have changed.  In my opinion this should be considered a bug.

The situation I am referring to is when we have a room that has a wall protruding into it, (see image below).  Prior to Revit 2017 a ceiling would go into this room with out any problem.  Now in 2017 you will have to manually place the ceiling using sketch lines.

2017-ceiling-bug