Category Archives: Structure

Revit Structure topics

Adaptive Component – Everyday Uses part 3

Continued from..

Adaptive Component – Everyday Uses part 2
Adaptive Component – Everyday Uses part 1

Creating Forms

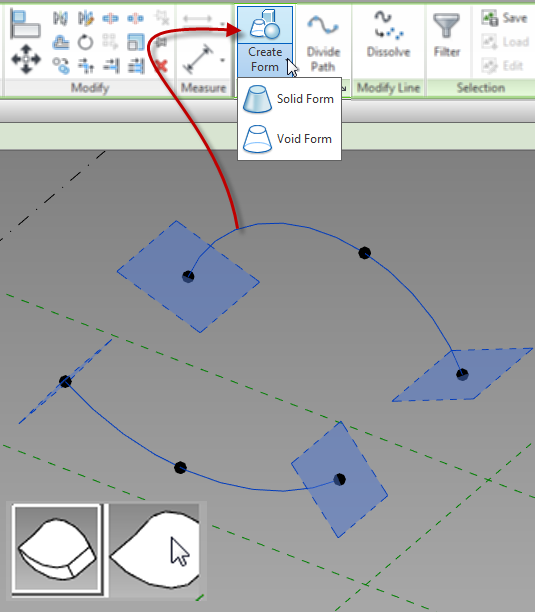
Unlike the normal family editor, in adaptive and mass families, surfaces and solids can be created.  These are created using the Create Form button and not extrusions, sweeps, etc..  Unfortunately points cannot be used to create elements, reference lines and/or model lines must be used for this task.  Lines can be used if they are part of the rig, however, if additional lines are required, then they need to be created prior to creating solids or surfaces.  In the adaptive (as well as mass) family environment, surfaces can be created from a single line or from multiple lines.

Surfaces and Extrusions

To create a solid or surface, select the desired lines and select the Create Form button.  Voids can be created in the same manner.  If Revit can determine more than one way to create a solid, or if it can create a surface, different images will appear on the screen allowing a user to select the appropriate one.

CreateForm

Sweeps

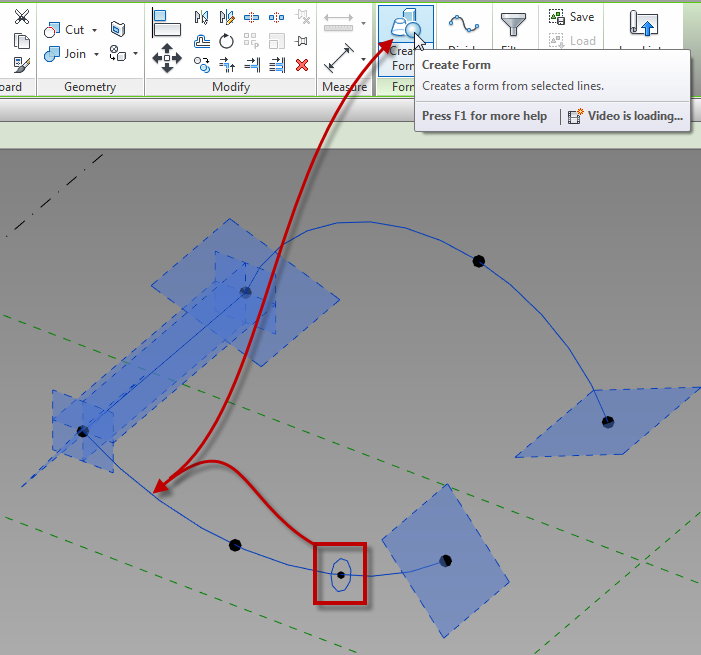
A sweep is created by drawing lines for the shape of the sweep, then by selecting those and the lines that represent the path.  Once all of the elements are selected, use the create form button to create the sweep.

CreateForm_Sweep

Revolves

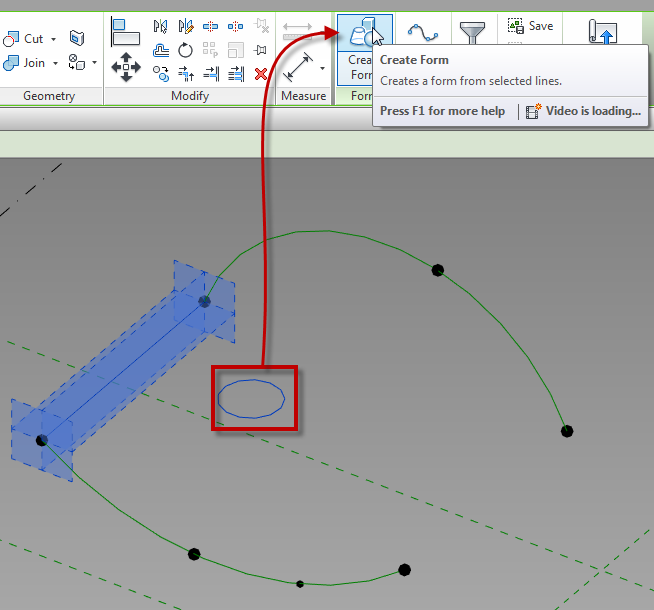
A Revolve is created by selecting a group of lines or arcs that are all parallel to a single line.  This one line acts as an axis.

CreateForm_Revolve

Once surfaces or solids have been created, their faces and edges can be used to generate additional forms.  For example, the edges of a cube can then be used for the path of a sweep, or the edge of a surface can be used to generate an additional surface.

Up next…

Adaptive Component – Everyday Uses part 4


Revit 2015 R2 Structural Framing Quirk

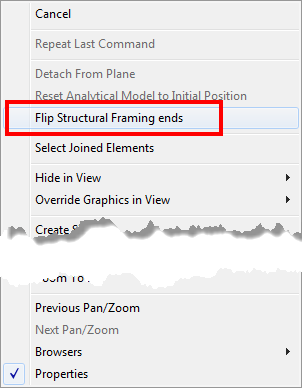
With the release of Revit 2015 R2 one of the big features for structural engineers was the capability to flip framing members.  A simple right click on the member and the option to “Flip Structural Framing Ends” appears.  This was a welcome addition and a nice feature to have, but be careful, there are some quirks involved with this feature.  This feature is in reality rotating the beam 180degrees while keeping some of it’s properties relative to the end and others not.

Revit_2015R2_StructuralFraming_Flip_03

Here are some of the quirks I have found to be associated with this new feature.

  • If one end of the beam is utilizing the “Attachment” value it will either be flipped or removed
  • Face based objects hosted to the beam will rotate with the beam and end up on the other side of the beam
  • Adaptive components hosted to the beam will either be rotated or simply disappear
  • When flipping sloped beams they can become detached from their work plane (not like this warning is rare)
  • Cross section rotation will become a negative value keeping it’s relation to vertical (nice catch programmers)

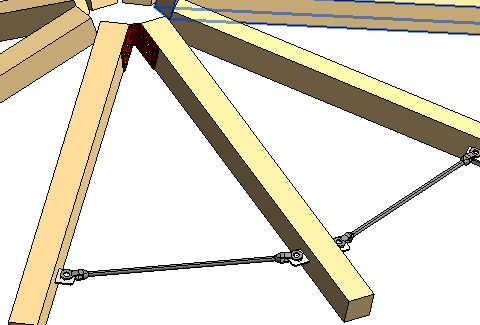
In the images below the plate that host the clevis and rod is the OOTB gusset plate family which is a faced based element, the red connection plate at the top is an adaptive component family.

Revit_2015R2_StructuralFraming_Flip_01

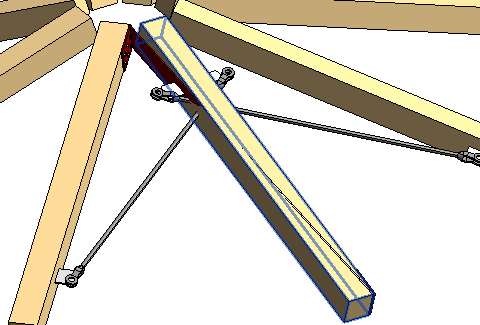
As you can see in the image below the beam rotates when flipped thus creating havoc on elements that are hosted to it.

Revit_2015R2_StructuralFraming_Flip_02

Conclusion to this feature is to be careful when flipping beams and verify elements aren’t hosted to them.

Spot Slope Revit

While helping set up a template with a client there was a discussion on how the graphic should look for the spot slope symbol, hence this post.

While  placing a spot slope there is an option to change the graphic representation to be either Arrow or a Leader.  However this option is not available in a plan, only vertical views such as sections.  This can also be done after placement in the properties dialog.

SpotSlopeTriangle

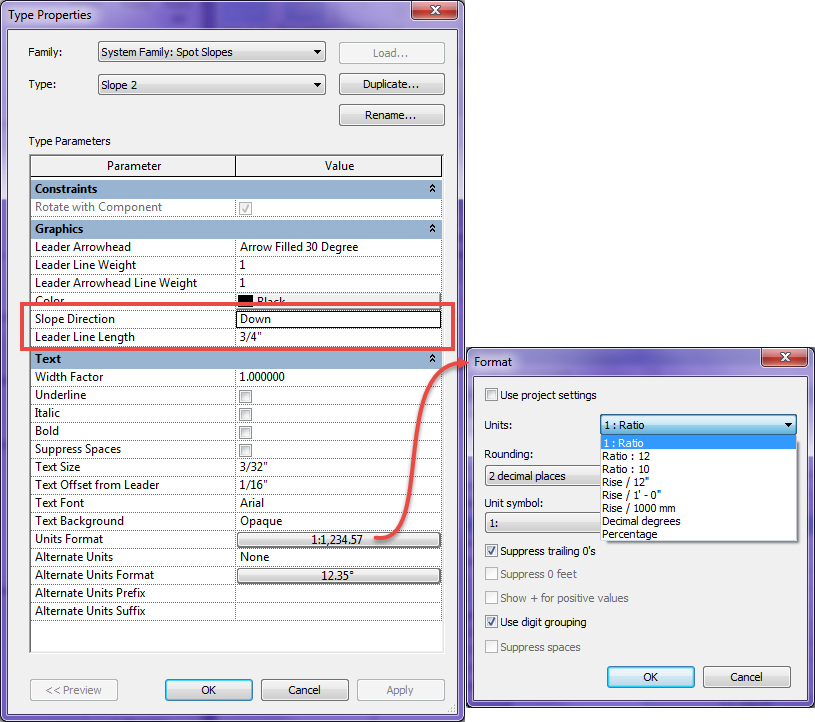
The type properties for spot slopes also allow for more options and variations on the display as well as the units:

  • Slope Direction allows for the slope to point down or up, however if the triangle option is used then it just changes the insertion point
  • Leader line Length changes the length of both the arrow and the triangle option
  • Similar to other dimension types the units format can be changed.  With slopes some firms like to display roof slopes with a Ratio/12 while displaying sloping floors with a ration or percentage.  By duplicating the slope type all of these options can be available.
  • Using alternate units will allow for Ratio as well as percentage or whatever combination in needed

SpotSlopeProperties

Analytical Model

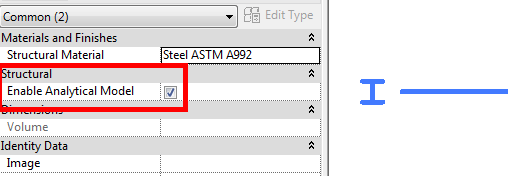
In preparation for my session on Structural Tools for Architects at BIM Workshops in Anaheim I thought of a nice tip that would be a good blog post.  When discussing structural tools inside of Revit I have heard the comment a few times that the model slows down once structural members are added.  If the members being added are K series joists or something similar then it could be due to heavy families.  Never the less what is also adding to the speed issue is the fact that all structural member, by default, have analytical properties attached to them.  Unless your firm exports out the structural members to an analytical program this feature isn’t needed.  To resolve this issue after the model has been created select all structural columns, beams, foundations etc and uncheck “Enable Analytical Model”.  If this is unchecked before placing an element that setting will be remembered and any element placed after, thus eliminating the need to keep unchecking as the model develops.

Enable_Analytical

The real tip here is to open your company template place a structural column, beam, brace, floor, wall and all three foundation types, before placing each type uncheck the “Enable Analytical Model” then delete the elements.  Your template has now been set to not have analytical model enabled thus possibly speeding up future models.  The only nuance is any member as part of a beam system or truss will still have the analytical model associated to it.

Dimensioning Sloped Framing

I have had some questions come up about dimensioning sloped framing, so I thought it deserved a blog post.

Question: Why can’t I dimension to framing members when they are associated to a sloped work plane?

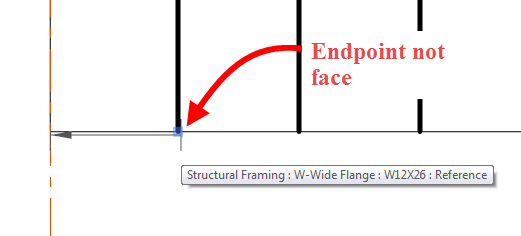
  • This question comes up when attempting to dimension in plan, in a coarse level of detail, when the framing member is Normal to the work plane, and when using the Linear Dimension option.  Beams can be selected using the linear option, however the user won’t be selecting a face, since it isn’t perpendicular to the view, they will be selecting the end point of the graphic line.
  • Make sure when dimensioning the endpoint of the beam is being selected and not a face.  It is sometimes hard to see but a grip will come up, along with a tool tip, when the end of the beam is selected.

SlopedFramingEndpoint


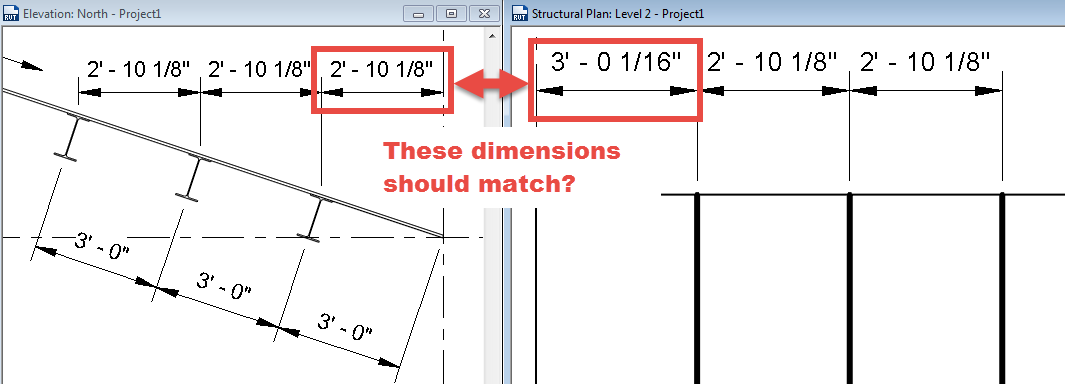
Question: Why aren’t my dimensions equal in plan and section?

SlopedFramingDimensions

  • This issue is due to the location of the symbolic line of the framing member.  In the elevation above the beam was dimensioned to the Top Midline, however the default setting for “Stick Symbol Location” is set to “Center of Geometry”, thus making the stick symbol location in plan different then in elevation.  Depending on how the family is created this property may only affect the plan and not any of the other views.
  • Selecting the framing member and changing the “Stick Symbol Location” value to “Top of Geometry” will insure that the plan dimension is the same as the elevation dimension.  However, it will need to be changed for all of the elements being dimensioned.

SlopedFramingFixed


I hope this helps clear up these two common questions.  If anyone has other tips about these please comment.