Tag Archives: Revit

Room Awareness

Paul Aubin and I were having a discussion the other night about signage.  It made me think of an age old process (age old for me at least) that I have been using since the early days of Revit and I thought I should share it.  When placing signage on a corridor wall it would be nice to have the sign be able to pick up a room id from a given distance on the other side of the wall.  As you may know that when scheduling an object it does know what space or room it is located in.  In this example the sign would know it was in the corridor and not represent the room or space it is intended for.  Families know their location in Revit by their insertion point, with hosted families the insertion point doesn’t have to be the face of the host.  I know this sounds odd but the family will host to the face, but the reference plane that defines it’s insertion may be in front of or behind the host and that is the value Revit will see to report the Room it is located in.  Yes Revit did introduce the “Room Calculation Point” tool in the family editor, but since it only goes a single direction and the distances aren’t adjustable it, in my opinion, is completely useless to me.

My solution was to add a reference plane behind the host surface (in this example the Host Back Face) and give that reference plane an instanced based parameter and set the “Is Reference” to weak and make sure the “Defines Origin” is selected.  This way I can now drag the reference plane such that it is inside the room that I need the sign to schedule.

Signage Insertion Point

In the project example below I have also added a side offset such that I can place the signage in the corridor and get it to read any of the room data behind the wall.

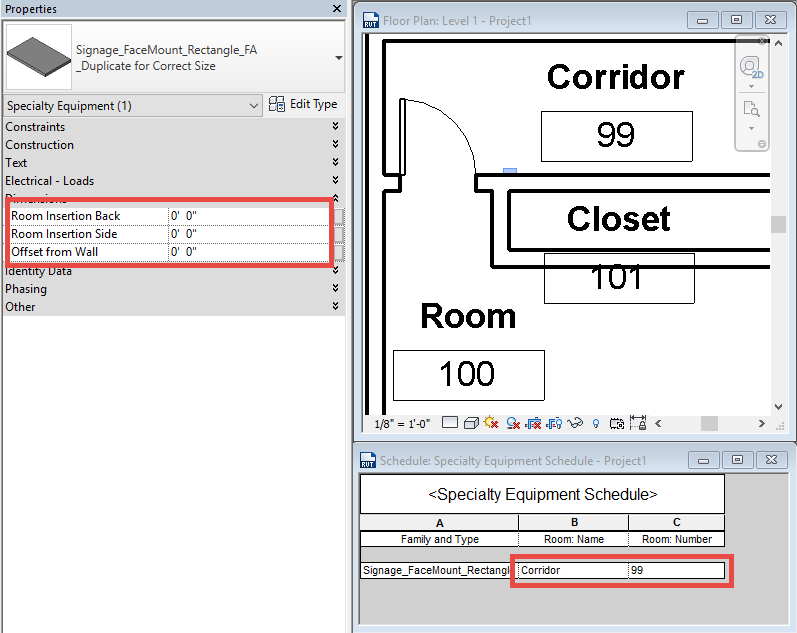
This example has all the insertion points set to 0″ and it will read the Corridor.

Signage Insertion 0


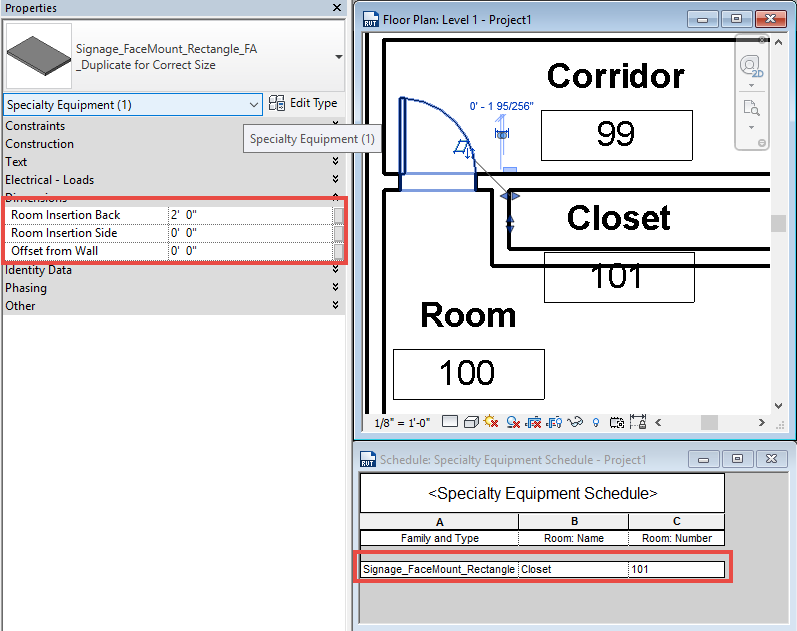
This example I was able to drag the insertion point (Room Insertion Back Value) to get it to register the Closet

Signage Insertion Back

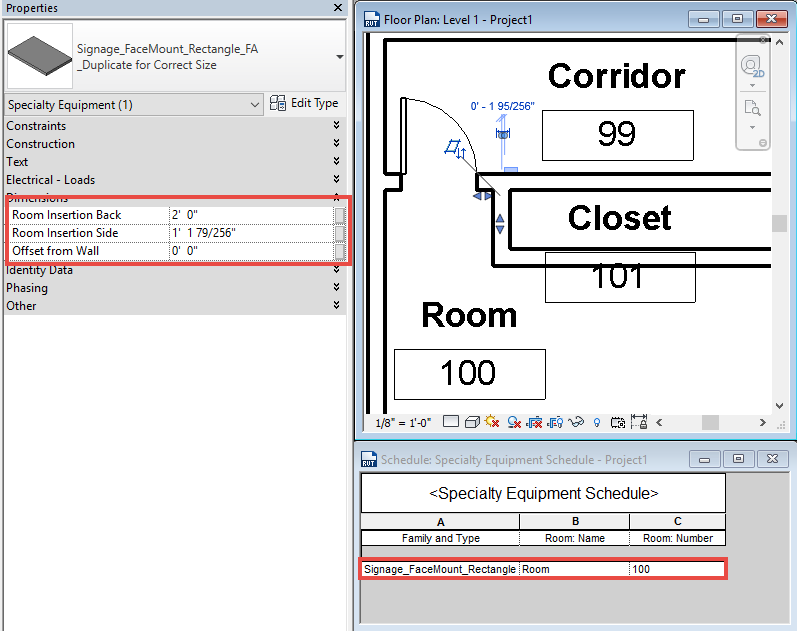
Then adjusting the Room Insertion Side value I can get it to schedule as Room 100

Signage Insertion Side

If you didn’t know about this trick hopefully it will inspire you to use it in other ways

Autodesk 360 Drive

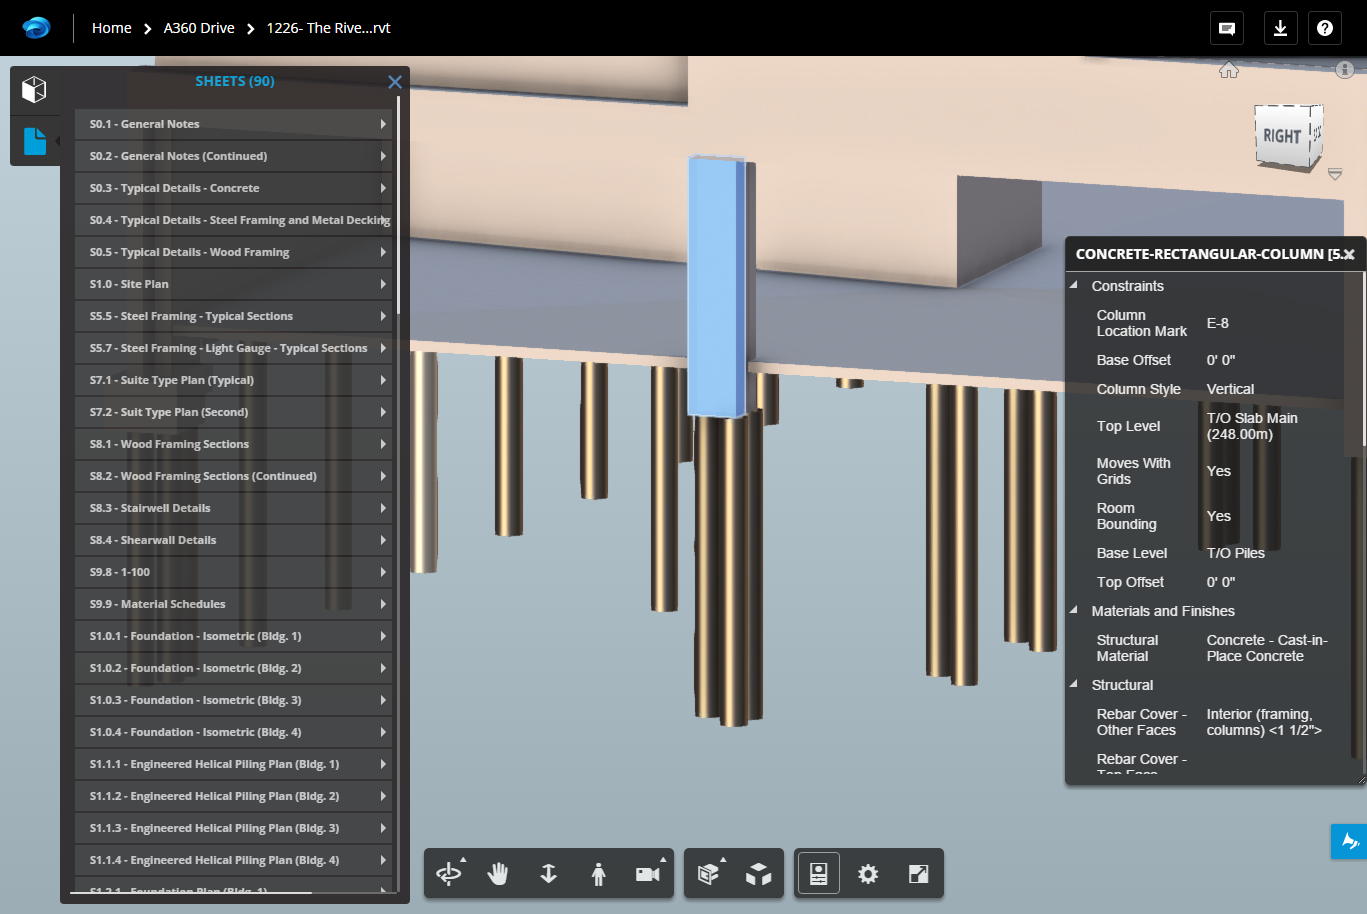
During my last Revit Radio session I found out that many users didn’t know that with every seat of software they get can set up an account using the Autodesk 360 Drive.  It is somewhat confusing since everything that Autodesk had as an online service falls under their A360 heading and for online storage there is A360 Drive, Team and Hub. All of the different versions get confusing but for this post I am going to focus on the A360 Drive accounts.  Actually there is a free version as well as a the subscription user version, the only difference that I know of is storage space, the subscription based version allows up to 25gb of storage space (I am not sure how much the free version allows).  If you are a Formit user or an Autodesk Revit Beta tester than you have already been using the A360 Drive for file storage.  Along with file storage there is also a very nice viewer that is associated with most file types.  So if you post a Revit model any user who the file has been shared with can view not only the 3D model but any sheets in that model as well.  To make this easier there is a nice panel on the left that will break the 3D model down to all the Revit categories and display all the sheets in the file as well.  Along with viewing they can also select elements and see the properties of those elements on the right side of the screen.  The navigation tools are simple and easy to use, probably because they are similar to Revit.

A360 Viewer

During Revit Radio someone had asked “Can this be used instead of Dropbox?”, my answer was absolutely yes.  Not only does it have a nice viewing feature (for most file types) it also has a larger storage capacity.

Part of the reason for this post is also to get the Revit users out there to Vote for Revit Families to get a viewing feature inside of A360.  As of now a .rfa is not a supported file type for the viewer.  Autodesk does have a website dedicated to feature requests for A360, there is a specific post specifically for Revit Families.  If you do browse the website and find any posts that you think should be part of A360 make sure to hit the Thumbs Up icon in the upper left corner to Vote this as a feature that need working on.  The more votes the higher it moves up the development list.


Revit 2014 New Features-Help

The Autodesk wiki help site now has the Revit 2014 on it as well as some of the other programs.  If you want to read the official what’s new, according to the help file, then check out the links below.  I do like the way they have it broken down for BIM managers, Installation etc.

Autodesk Revit Help 2014

Autodesk Revit Help What’s New

Revit 2014 New Features

Anybody in the blogging world isn’t going to compete with the thoroughness of David Lights posts about new features in Revit.  I would just like to add a few comments on some of my favorite new features:

Alternate dimensions:  Although this hasn’t been that big of an issue I work with many clients that do work both in metric and imperial units so this little feature is a nice and welcome addition.  Having the ability to not only show the alternate dimensions but have the choice of where they are located will be big for some of my clients.

New Material UI: This was one of the most frustrating changes in 2013 and made for huge losses of time in the delay and craziness that it was.  Well it is now back to a tabular format which is not only faster bust just makes more sense overall.

Double Click Options: The fact that when you double clicked on any family that family was then opened in the family editor was probably the biggest frustration to users that I spoke with.  In 2014 we now have options for a multitude of things to happen when an object is double click on.  This is a great feature and will make, at least myself happy, but many others as well.  No more trying to edit a tag and ending up in the family editor.

Selection enhancements:  Tired of having those new users move linked files around, not knowing about the press and drag feature and moving numerous other elements around?  In 2014 there is now a select setting that will allow for links, underlays and pinned elements to not be selected. (caution on the pinned elements, beams in a beam system, mullions on a curtain wall can be pinned elements.  So if you can’t select those elements you might want to check the settings)

Schedules:  For anyone who has met me knows I am a total geek when it comes to schedules.  We they have had a major overhaul and there are many changes with them.  Including more categories (thank you detail items and generic model additions) and a new conceptual ribbon for the numerous editing changes we have available.

If you are looking for more information on any of the above feature check out David post or the Autodesk site.

Framing Orientation

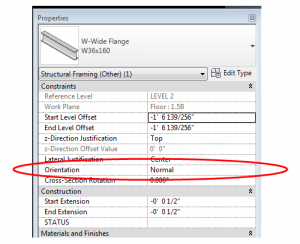
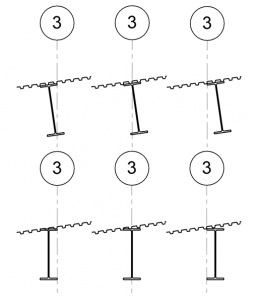
This is one of those Revit basics that has been forgotten, or perhaps never learned.  In the instance parameters for structural framing members, there is a parameter called “Orientation”.

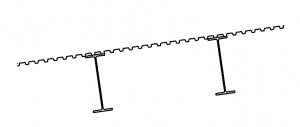
The framing member is only affected by this property if it was modeled on a sloped work plane.

The default orientation is normal – normal to the work plane.

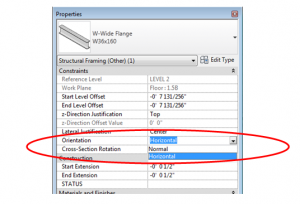
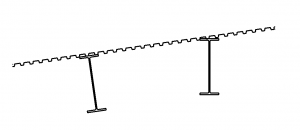
If the orientation is changed to horizontal, the beam will rotate such that the flanges are horizontal.

One item of note is that the rotation point is at the intersection of the top of the beam and the lateral justification (Side 1, Center, or Side 2), so if perfect accuracy is required, the beam may have to be shifted down.  The screen shot below shows how the different combinations of a horizontal orientation interacts with the Lateral Justification.