Tag Archives: Filter

Parameters for Sheet List

As many users know in Revit if there are multiple disciplines working in different models things can be scheduled from those linked models, sheets are no exception.  However most companies will have custom parameters to get the schedule to sort, group and filter a give way.  So I am asked a lot how can the consultant easily get this information?

The common answer I hear is to Transfer Project Information which will bring along the necessary project parameters needed to fill out for the prime to get their schedule set up accordingly.  The problem with this feature is that it will bring along all of the project parameters, most of which will not mean anything to a team outside the prime office.

My suggestion is to open the model of the project lead and find the schedule that is being utilized.  Simply Copy that schedule to the clipboard and paste it into your project.  This will bring only the project parameters utilized for the sheet index and leave all the unneeded values behind.

My personal favorite is an option where the project lead creates a blank project that only has the project parameters and has the appropriate schedule inside of it, along with instructions on how to use all of the values that are needed for the sheet index.  This way the consultants can use Transfer Project Information easily and only get what is needed and have a direction on how to utilize them.

 

Schedule only Linked Items

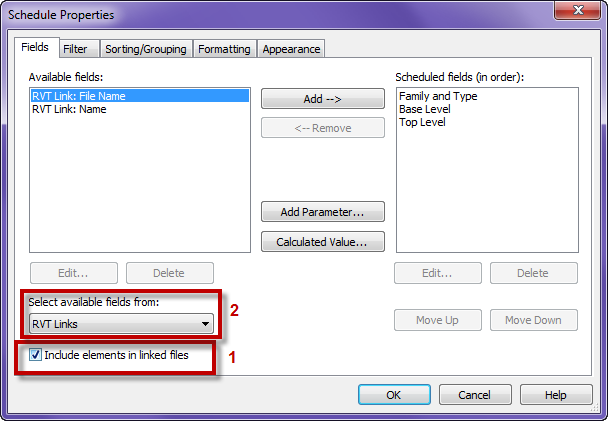
The question of how to schedule only elements from a liked model has come up a few times so I thought it would make  good post.  The first trick is to understand how to schedule items from a link, this is a simple process of checking the box in the lower corner of the schedule properties (1).

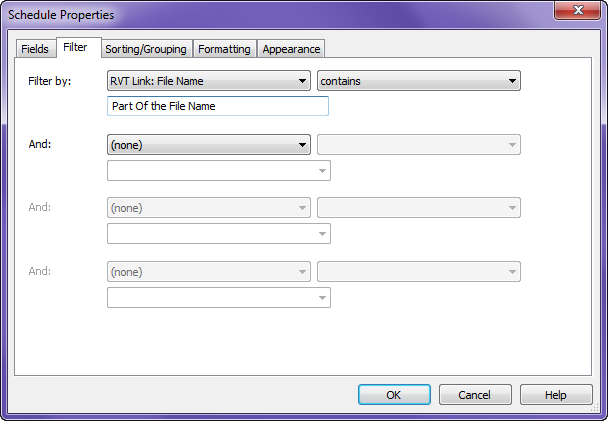
Once this has been checked there is now and option Select Information from RVT Links (2) Select “Revit Link: File Name” and add it to the fields.  Now in the Filter tab it can be set to contain part or all of the name of the linked model.


Show only Core of walls

For many years I have been asked the question “Is there a way in Revit to only show the core of the wall?”.  Recently this question came up yet again during a session of Revit Radio, but this time it came up right after an example with parts.  So this got me thinking could we break up a wall into parts and then use filters to somehow turn off those parts.  Ironically at the same time Dezi was working on a similar situation to only show the core of the  Architects walls through a linked model.  So we sat down and worked on this together and came up with a solution, YES you can only show the core.  Finally the answer everyone has wanted to hear to this question over the years.

The first step to this procedure is to send Dezi and I some nice bottles of wine as a thank you….  Ok just joking I am writing this while high in the mountains of Alma Colorado while having a nice evening and running out of drinks and not wanting to drive into town to get more…

The real first step is to select the walls and select the Create Parts button.  This will divide the layers of the wall into individual parts.  It will also set your view properties  “Parts Visibility” to Show Parts.

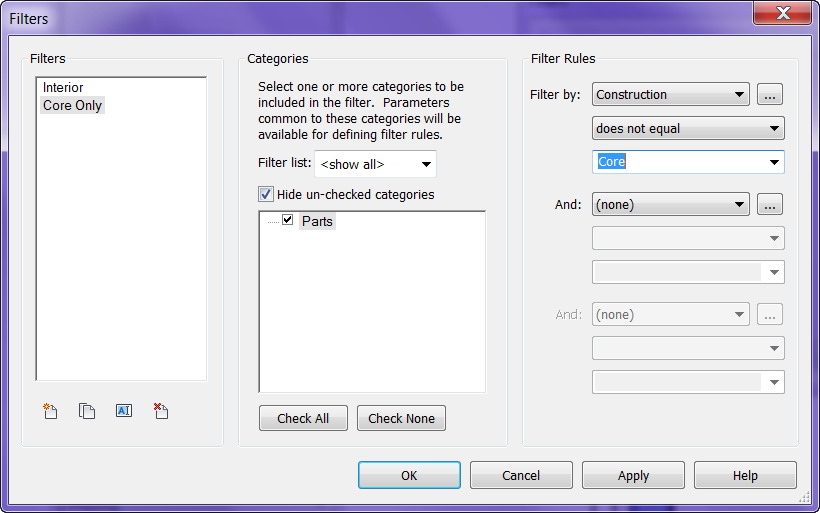
The next step is to create a filter so that the other parts of the wall can be hidden. On the View tab, Graphics panel, select the Filters button.  Name the filter, assign it to Parts for the category, set the Rules to be Construction >> does not equal >> Core.

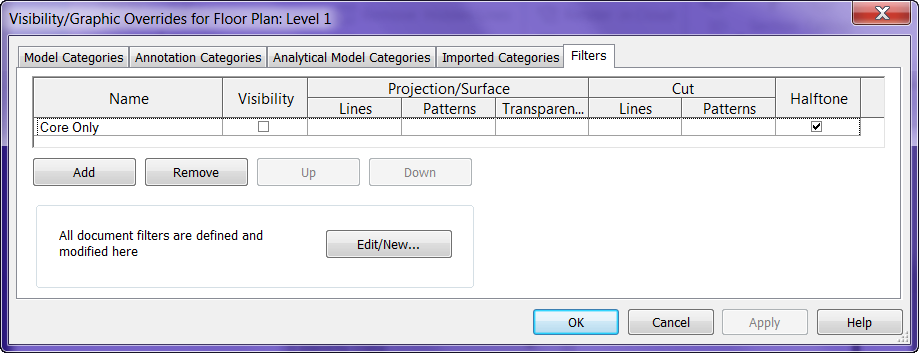
Add this filter to your view via the Visibility Graphics >> Filters tab and un-check visibility

It could also be filtered by materials or whatever else is needed, I just used Construction property for this post.  Dezi also found out that this will work nicely through linked files to turn off certain parts of the Architects wall for her Structural model.

If you want to display all the layers of the wall you don’t have to edit the Filters again just change the “Parts Visibility” property to “Show Original”

Of course there are limitations to this system; the lack of stability with parts in the 2012 release,  join conditions can be funky, some walls can’t have parts applied to them period.  So when I say yes we can use this to display only the core I guess it will depend on the stability of parts and wall joins.  Just a thought for everyone to try let me know how well it works for your conditions.

Revit Basics – The Filter Button

This is an excerpt from an article that I wrote for AUGIWorld.

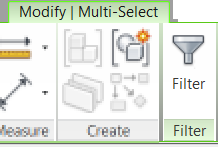
When multiple items are selected, it is a common practice to use the Filter option that appears on the Ribbon’s Modify/Multi-Select Contextual Tab only when multiple items are selected.

Alternately, one might use a keyboard shortcut such as “FF” to activate the filter.  One may have even noticed that there is a tiny filter symbol at the bottom right of the screen, on the Status Bar.  What is lesser known is that clicking on this symbol will activate the filter command.