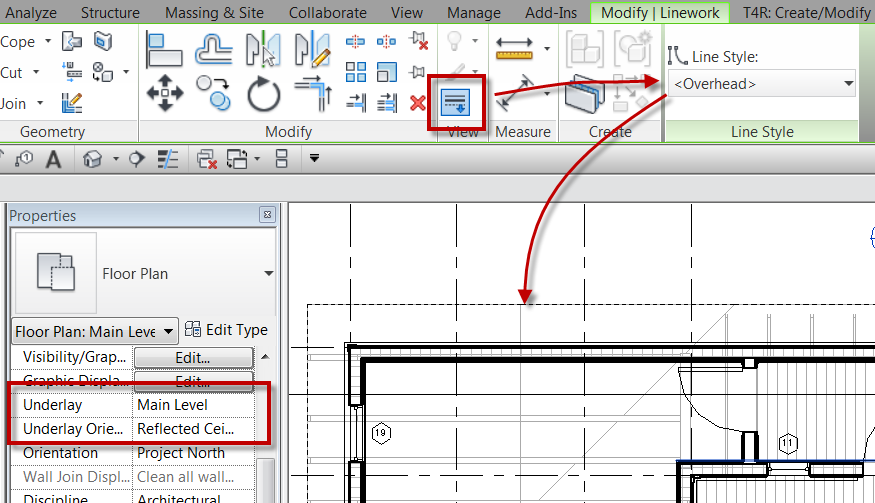
This is a tip that I have been showing for years and I was reminded of it today while training a student. The tip involves the use of the Linework tool along with underlay while in plan views. This student was asking how to display the roof overhang in plan and wondered if it could be displayed as hidden lines. The first, most CAD-like, response was to simply draw hidden lines where these elements were. I explained how that is an option, but what happens when the roof changes or moves? Now someone would have to go back and adjust the lines to match the changes. If Revit could do that automatically, that would be a better solution. My suggestion was to turn on the underlay so that the elements in question could be seen.
To do this, set the underlay to the current level, and the set the plan orientation to Reflected Ceiling Plan. Then, on the Modify tab in the View panel, select the Linework command and set the line style to <Overhead>. Now select the lines that need to be displayed in the plan. Once that is done go back and change the Underlay to None and the lines that had been changed via the Linework tool will still be displayed.
If you decide later that the lines are no longer needed DO NOT DELETE the lines, this will delete the physical element. Instead, again use the Linework took and with the linestyle <By Category> and select the lines. The lines will go back to their default display, or not displayed if the were changed as an underlay.

