Category Archives: Structure

Revit Structure topics

Revit Structural Deck Line Types

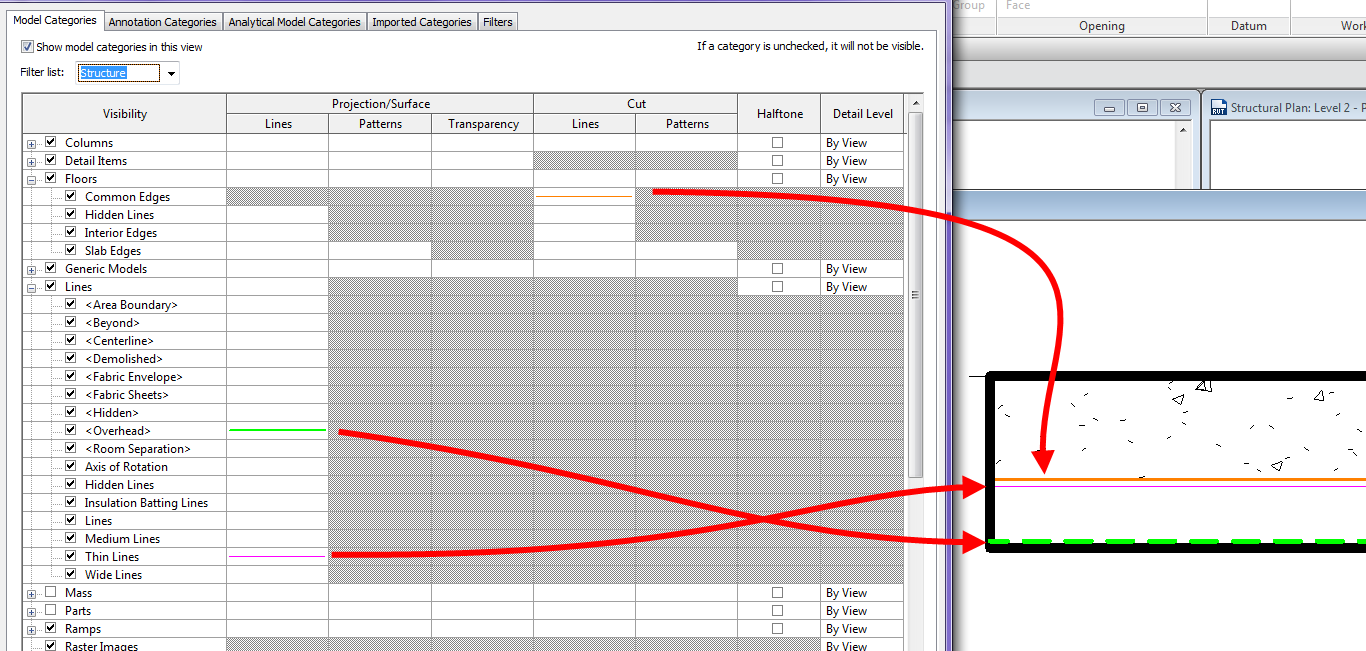
For a few releases now Revit has had the capability to model composite decks with 2D graphics to display the metal deck when in sections.  While working with a client the question came up on what determines the line weights / line types in views.  After some trial and error I was able to determine what is happening with these lines.  When the section is perpendicular the deck, nothing special the line weights are simply controlled by the Floor category and the Section styles, however it is a different story when cutting parallel to the deck.

The line that shows the transition from the layer above to the metal deck (shown orange below) is the subcategory Common Edges under Floors

The line that is representing the underside of the top of the metal deck (shown magenta below) uses the subcategory Thin Lines under the Lines category

The line that represents the top of the lower portion of the metal deck (shown green below) uses the subcategory Overhead under the Lines category

Composite_Deck_LineStyles

RTC 2014

My blog has gone dark for a while in case you didn’t know my family was blessed with a beautiful baby girl, aka #BIMbino. I was planning on taking a break for a while and then start blogging again once she started sleeping through the night.  Since this hasn’t happened yet and I don’t envision this happening anytime soon I decided it was time to start up again, however I doubt I will be blogging as often as before the BIMbino.  What better of an excuse to get me started than Revit Technology Conference.

This year at RTC I was privileged to speak in three sessions.  This isn’t the reason I am blogging I also attended some great sessions taught by excellent well known speakers.

One of the sessions I enjoyed was based on Navisworks and quatification taught by Jason Dodds.  This session covered the takeoff tools, creating and importing catalogs.  Jason also did a great job explaining the difference from when these tools were in Autodesk QTO.

Another session was taught by Andy Milburn where he covered mass families where he has developed a few different ways of making rigs to create content.  I personally like his box theory and using an invisible box as a rig platform.

Havard Vasshaug taught a two part lab on computational logic in structure.  Unfortunately I was only able to attend half of this session but what I saw was great.

I got to finish up the conference on the main stage for the redesigned Tips & Trick led by Desiree Mackey.  In the past a they have presented slides based on tips from different sessions taught, this year they decided to a battle of the tips, complete with a gong.  There were two teams myself, Amy Manning and Matt Nelson vs Zack Kron, Scot Brown and Nick Hugley and we had to present some tips from the sessions while being able to add in some of our own.  If the panel, Jim Balding or Wesley Benn decided you were stumbling, didn’t like the tip or just wanted to hear a loud noise they would with the 3 foot (91cm) GONG and you had to move on.  I thought it was a new fun way to present the tips and it did get the audience involved which for me was very fun.  Although we did win some considered bringing two babies on stage was a bit of cheat.

With that said the North American conference was well worth the time and the information one can get from it makes it a must attend event.  I am looking forward to speaking and attending RTC Europe in Dublin over Halloween.


Tie Beams to Columns

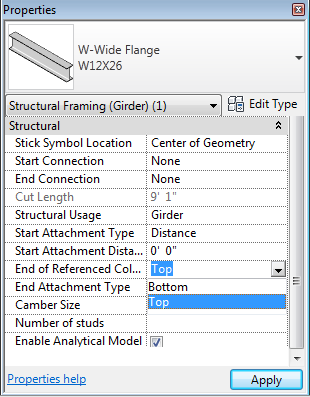
When first using Revit Structure it can be frustrating that when the height of a column moves or changes, the beams that were associated to the top of the column didn’t change elevation with the column.  This condition was changed a few releases ago but it still seems to be a rarely utilized property.  If a beam is modeled to a column, two properties are applied: Start Attachment Type and/or End Attachment Type.  These values, when set properly, allow the beam to move up or down with the column.  By default the values are set to End Elevation, which doesn’t associate the beam to the column.  For the beam to be associated, this value should be changed to “Distance”.  Once distance is selected then two additional properties appear: Attachment Distance and End of Referenced Column.  The distance value can be used to adjust the end of the beam such that it isn’t aligned with the end of the column.  Unfortunately, this value will always move the beam away from the ends towards the center of the column and not outside the ends.  End of Referenced Column can either be set to the top or bottom of the column so the beam moves accordingly.

Beam End Symbols

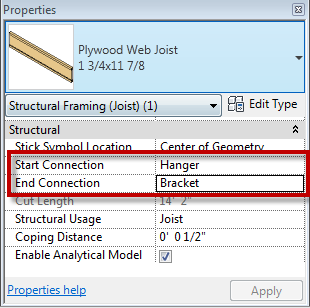
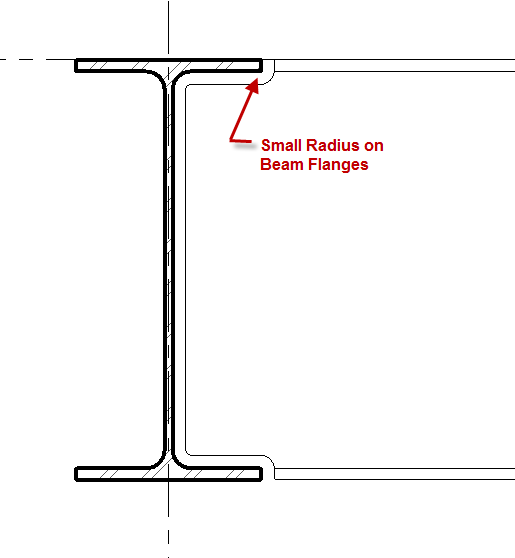
With beam members there has always been the ability to show a start or end connection symbols.  In the early releases connection symbols were limited to Moment Frame and Cantilever Moment.  These symbols could have any graphics desired, but they were the only two options.  In the last few releases this feature was opened up so many connection types and custom symbols can be created.  Several firms have used this feature, but since it has been opened up, the applications can go beyond the classic option.  Firms could use this feature for all types of building construction.  For example, it could be used in wood construction to show the different types of hangers and/or fasteners in plan graphics.  Customizing this feature is a multistep process, but once added to a template, the options will be available for the entire team to use.

  • The first step is to create the connections symbols.  There isn’t a template specifically designed for this, so start with a generic annotation family.  Then, using the Family Category and Parameter button, change the family type to be Connection Symbol.  The intersection of Reference Planes is the insertion point, which is the end of the beam.  The symbol should be drawn to the right of the insertion point.  There is also an option for “Automatic Cutback for Beams and Braces”.  This option allows the symbol to add an additional cutback to the beam’s symbolic line in the project.  If the intent is to have the  symbol be added directly to the beam line, this should be unchecked.
  • Once the symbol is created, load the family into the project, or project template.  In Structural Settings, go to the Symbolic Representation Settings tab and add a new Connection Symbol for Breams and Braces.  Once the new Connection Type is created, choose the appropriate symbol.
  • Now when a beam is created the new options will be available for connections within the beam instance properties.

All of the above is also applicable to structural columns connections.