
During a recent session of Revit Radio I was asked a few questions about roofs and their properties. A post I did a while ago on Roof Overhang Values which covered one of the questions. However it didn’t answer the question of why are the roof eaves not aligning? In the image below both sides of the roof have a 3′ (914mm) overhang with the same roof pitch on the entire roof.
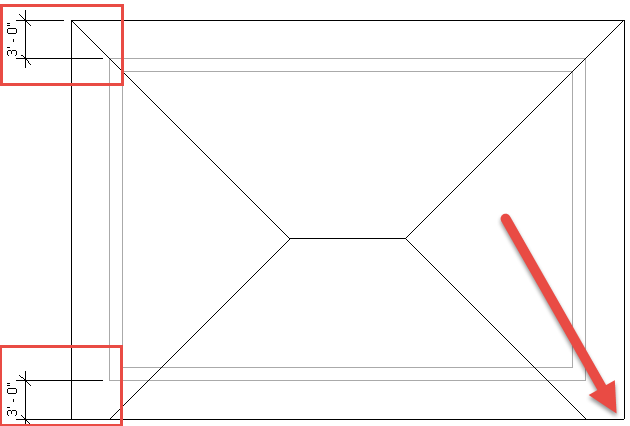
The reason this may happen is the fact that one of the sketch lines used the pick wall tool whilst the other was simply drawn as a line (or possibly the pick lines tool with an offset).
What the help file doesn’t explain is that when the pick walls tool is used along with defining that edge as a slope then the slope starts from an edge of the wall picked (the edge of the wall depends on if Extend into Core is used or the roof is set as a Truss or Rafter). If a line is sketched then the slope will start from sketch line itself. Using both of these tools will cause the issue as seen in the above image. Revit however does have a simple tool to assist in adjusting the roof eaves if this situation does arrive. The tool to accomplish this task is Align Eaves and can only be accessed while in sketch mode.
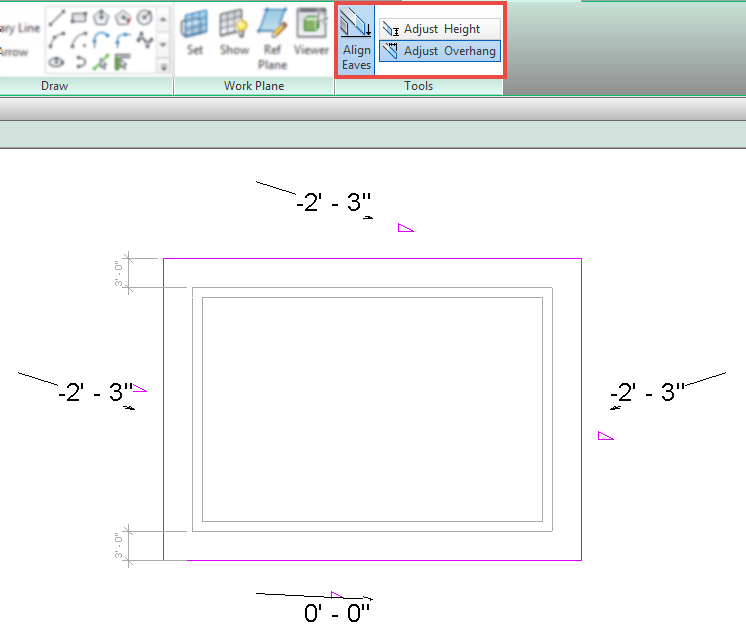
If the eaves are aligned Revit will flag a warning of “All eaves are already aligned”, if the eaves do not align then Revit will display the elevation of the eaves relative to the closest level. There are also two overlooked option on the contextual ribbon “Adjust Overhang” & “Adjust Height”. Before attempting to adjust the eaves make sure to select the correct option, most of the time this will be Adjust Height, yet the default is Adjust Overhang. Once the correction option is selected choose the value that is correct and select the sketch lines that need to adjust, similar to the align tool.
Pingback: Weekly Roundup – 2015.49 | The BIMsider